Installing Instructions
- Unzip the file downloaded plugin from codecanyon. You can download all your purchased files from https://codecanyon.net/downloads
- Upload all the files to the /wp-content/plugins/subscribe-to-download
- Activate the plugin through the ‘Plugins’ menu in WordPress.
- For customizing the plugin’s settings, click on Subscribe to Download option menu in WordPress left admin menu.
OR
- Open your Dashboard-> Plugins-> Add New
- Click on Upload Plugin
- Click on Choose File
- Select the file codecanyon-9LEaKqpR-subscribe-to-download-an-advanced-subscription-plugin-for-wordpress.zip file and click Install Now
- Once the plugin is installed click on Activate Plugin
- You are done, to customize the plugin’s settings, click on Subscribe to Download option menu in WordPress left admin menu.
How to update your plugin?
As soon as you receive the update notification email from the codecanyon for our product "Subscribe to Download - An advanced subscription plugin for WordPress", you can then go to your codecanyon account's download page and then download the latest update. You can view your downloads page from below link.
https://codecanyon.net/downloads
Once you download the latest version, please deactivate and delete the existing version plugin from your site and install and activate the latest downloaded version. And yes, all your settings and forms will remain as is even after you deactivate and delete and install the new version.
If you have any confusion regarding installing the plugin then you can check the above instructions.
Basic Setup
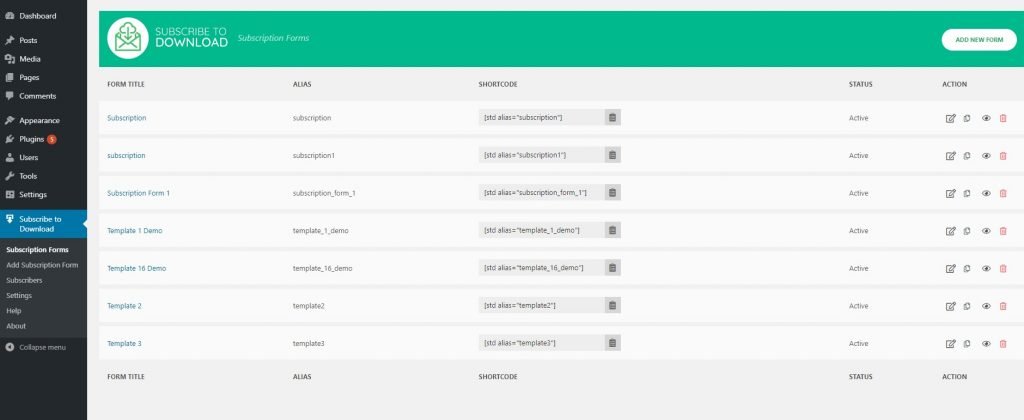
As soon as the plugin is installed and activated, you will be able to view the Subscribe to Download menu in the left admin menu. And you can then click on that menu to see the list of subscription forms.
In this section you can view the list of all the subscriptions that have been created.
To add a form, you can click on Add Subscription Form sub menu inside the Subscribe to Download menu and then configure the form as per your need.
There are 5 different settings section needed to configured while creating a form as belows:
- General Settings
- Form Settings
- Layout Settings
- Email Settings
- Custom
General Settings
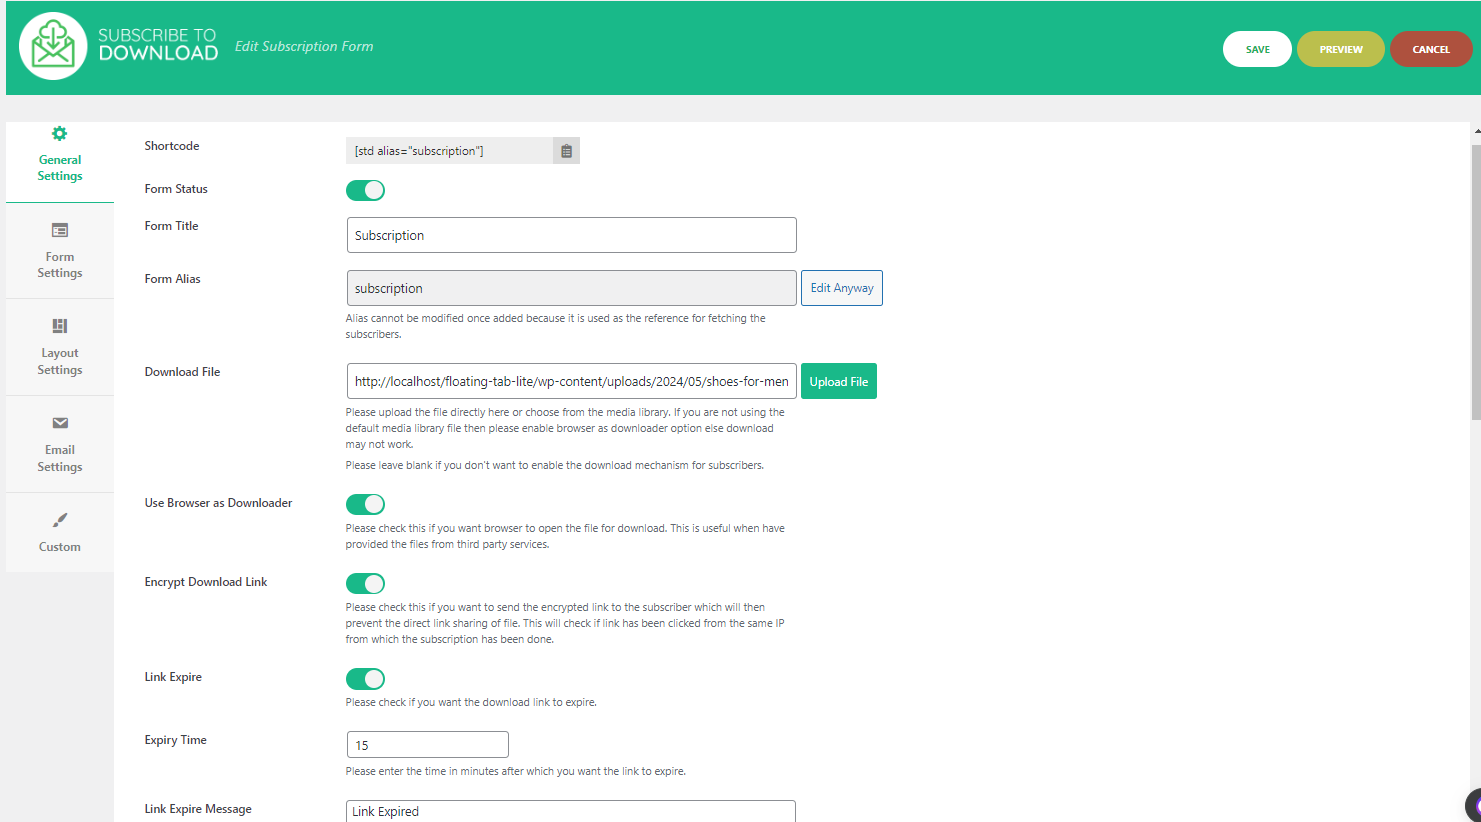
In general settings, you can configure all the basic settings for the form such as Form Title, Form Alias, Download File etc.
Here are the description of individual options available in the general settings.
1. Form Status - This will enable and disable the form in the frontend.
2. Form Title - This is the main title of the form for the recognition of the form everywhere.
3. Form Alias - This is the nickname of the form which will be used in the shortcode. This shouldn't contain any special characters and space. You can use underscore(_) instead of space while entering the alias and should be unique i.e the same alias shouldn't be repeated in multiple forms.
4. Download File - In this field, you can enter the file that you want to send your subscriber in the email after the download. Please make sure you choose the download file from the media library and not from any external source. Else download may not work.
- Use Browser as Downloader - Enable this if you want the browser to handle the file download. Useful for files hosted on third-party services.
- Encrypt Download Link - By enabling this option, the download link will be encrypted and the file won't be downloaded through direct link sharing. When you enable this option, you can also track the download status of each subscribers in the subscribers list in the backend.
- Link Expire - Enable this to make the download link expire after a certain period.
- Expiry Time - Enter the number of minutes after which the download link should expire.
5. Redirection - Enable this option to redirect subscribers to a specific URL after successful subscription.
- Redirection URL - Enter the URL for post-subscription redirection.
6. Instant Download - Enable to allow users to download the file immediately after subscribing without any verification. A download button will appear below the subscription success message.
- Instant Download Button Label - Customize the label of the instant download button.
7. Form Success Message - This is the message shown to the users when subscription is successful.
8. Form Required Error Message - This is the message shown to the users if users don't fill all the necessary required fields.
9. Form Error Message - This is the message shown to the users if the email couldn't be sent to users due to invalid email or any other server related reason.
10. Always Show - You can check this option if you want to display the form to the already subscribed users too. If you don't enable this option then download button will be available where the form is displayed which label can be configured from the Download Button Label Text field just below this option.
11. Unallowed Email Domains - This is also a new option which we had added in our Plugin Version 1.0.5. With this option, you can enter the email domains which you don't want users to enter in the subscription forms which will then prevent the subscribers from entering fake email domains for receiving the download file.
12. Unallowed Email Error Message - This is the message that will be shown to the users when they try to subscribe through any of the unallowed email domains that you have entered in the backend settings.
13. Mailchimp Lists / Constant Contact List - Please note that these option will only show if you have configured the necessary credentials in the "Settings" section of our plugin which will explain later within this documentation. If you have configured the necessary credentials and fetched the list of Both Mailchimp and Constant Contact then those list will show in end of the General settings panel like in the below screenshot through which you can choose the required list in which the subscriber will be automatically subscribed.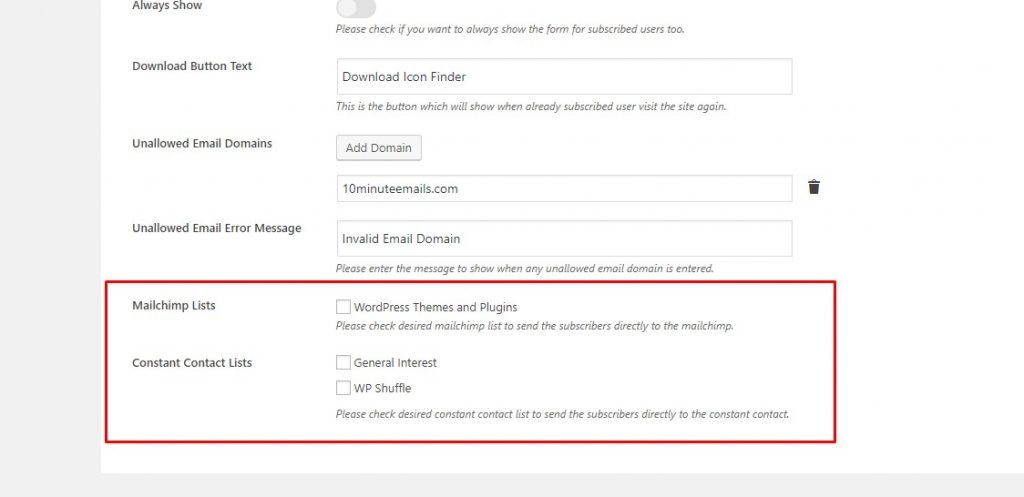
Form Settings
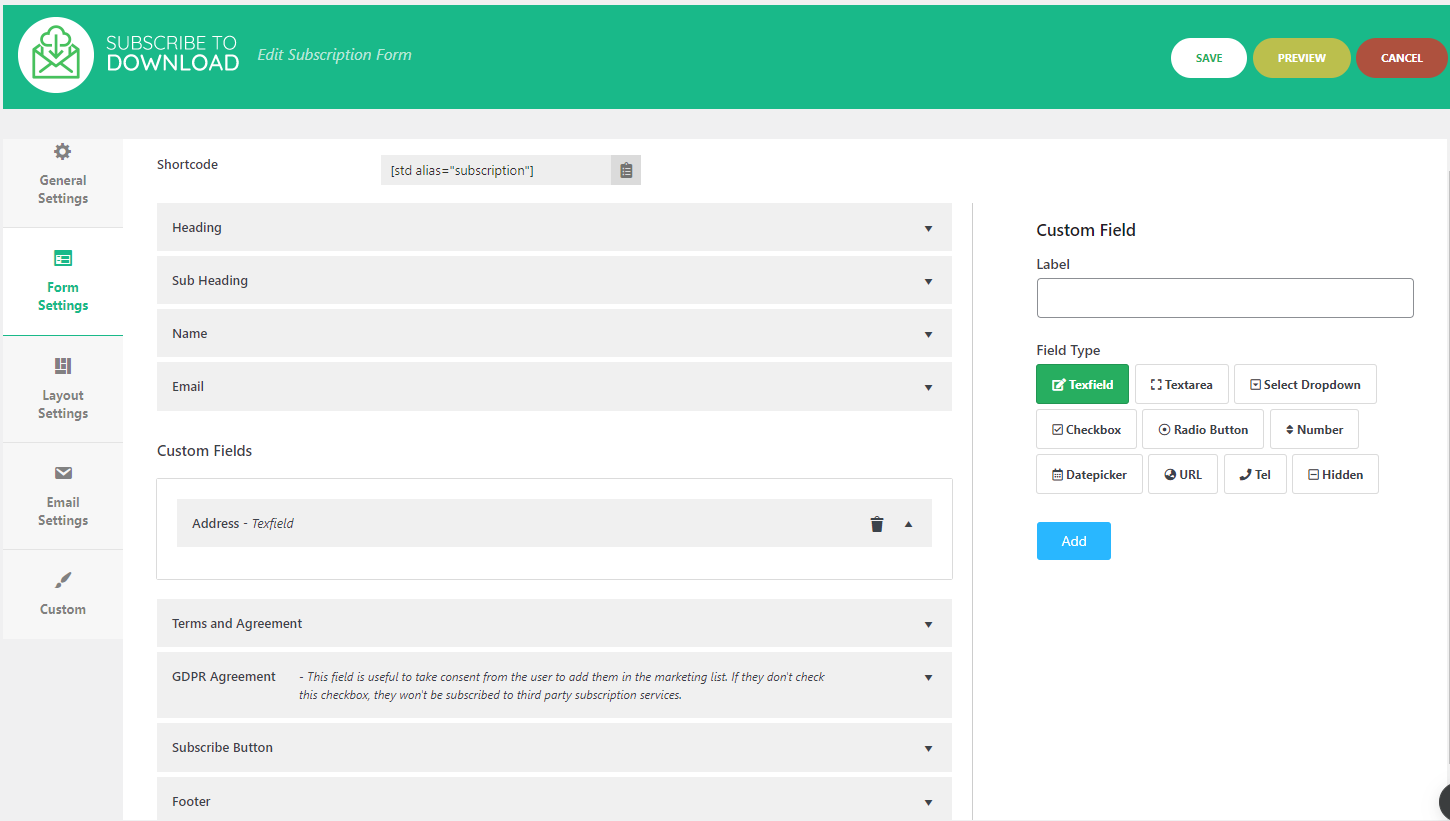
In this section you can configure all the form components that are available in the subscription forms. You can enable/disable and configure labels for each field.
Below are the available form components.
- Heading
- Sub Heading
- Name
- Custom Fields
- Terms and Agreement
- GDPR Agreement
- Subscribe Button
- Footer Text
Custom Field Settings
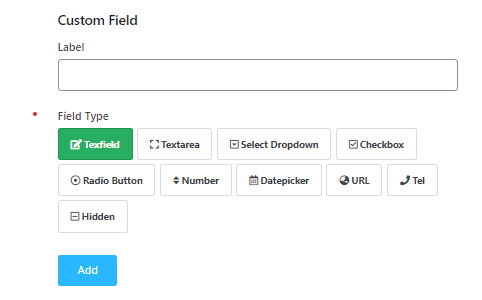
If the pre available fields are not sufficient then you can add custom fields which has various field types. The available fields types are:
- Textfield
- Textarea
- Select Dropdown
- Checkbox
- Radio Button
- Number
- Datepicker
- URL
- Telephone
- Hidden
Layout Settings
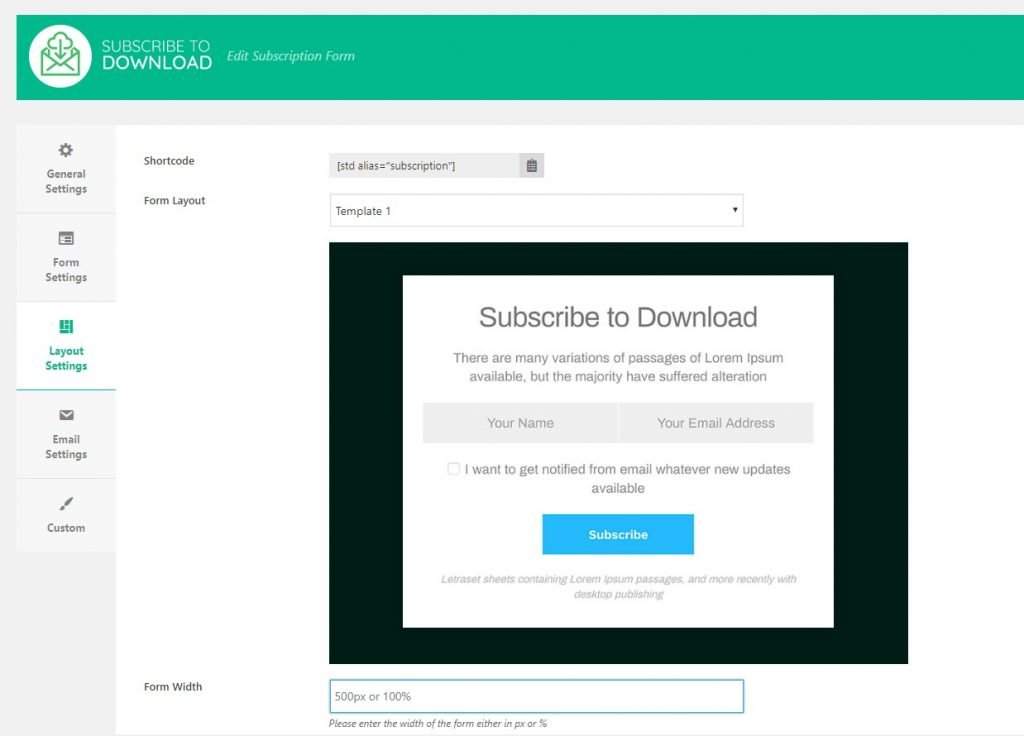
In this section, you can configure necessary settings related with the layout of the form. You can choose any one templates from our 22 beautiful pre-designed templates.
Here are the options available in this section:
- Form Layout - This option includes the dropdown of all the available pre designed templates from which you can choose one. There are 22 template available currently which can be checked through selecting each template.
- Form Width - By default each template has been provided certain specific width for each template but in case you want to customize the width then you can enter your desired width in px or in % as per your requirement.
- Display Type - There are two display types currently. One is Direct Display and Another one is Popup Display Type. So if you want to display the form directly when the page is loaded then you can choose the Direct Display and if you want the users to display the form in Popup through Popup Trigger then you can choose Popup Display.
- Popup Trigger Text - This option will only show when you will choose the Popup Display as the Display Type.
Email Settings
In this section, you can configure all the necessary email related configurations such as "From Name", "From Email" etc.
Here are the available options inside this section.
1. From Email - In this field you can enter the email that will be used as the from email while sending any email through our plugin such as confirmation email, download link email. While entering the From Email, please make sure you don't enter the email that resembles the real person email which might land the email into the spam or junk. You can enter email such as noreply@yourdomainname which won't resemble any real person email.
2. From Name: "From Name" is also used as while sending any email through our plugin. As similar with "From Email", you should enter the value that won't resemble any real person's name such as "No Reply".
3. Download Email
- Download Email Subject - In this field you can enter the subject of the email in which the download link is sent.
- Download Email Message - In this field you can configure the message that you will send with the download link.
4. Download Notification
- Status: Enable or disable the notification for successful downloads.
- Download Notification Email Subject: Enter the subject of the email sent to notify that a file has been successfully downloaded.
- Notification Emails: Enter the email addresses that will receive download notifications. Separate multiple addresses with commas. Leave blank to send to the site admin.
- Download Notification Email Message: Enter the message content for the download notification.
5. Admin Notification
- Status: Enable or disable the notification for new subscriptions.
- Admin Notification Email Subject: Enter the subject of the email sent to notify about a new subscription.
- Notification Emails: Enter the email addresses that will receive new subscription notifications. Separate multiple addresses with commas. Leave blank to send to the site admin.
- Admin Notification Email Message: Enter the message content for the new subscription notification.
Custom
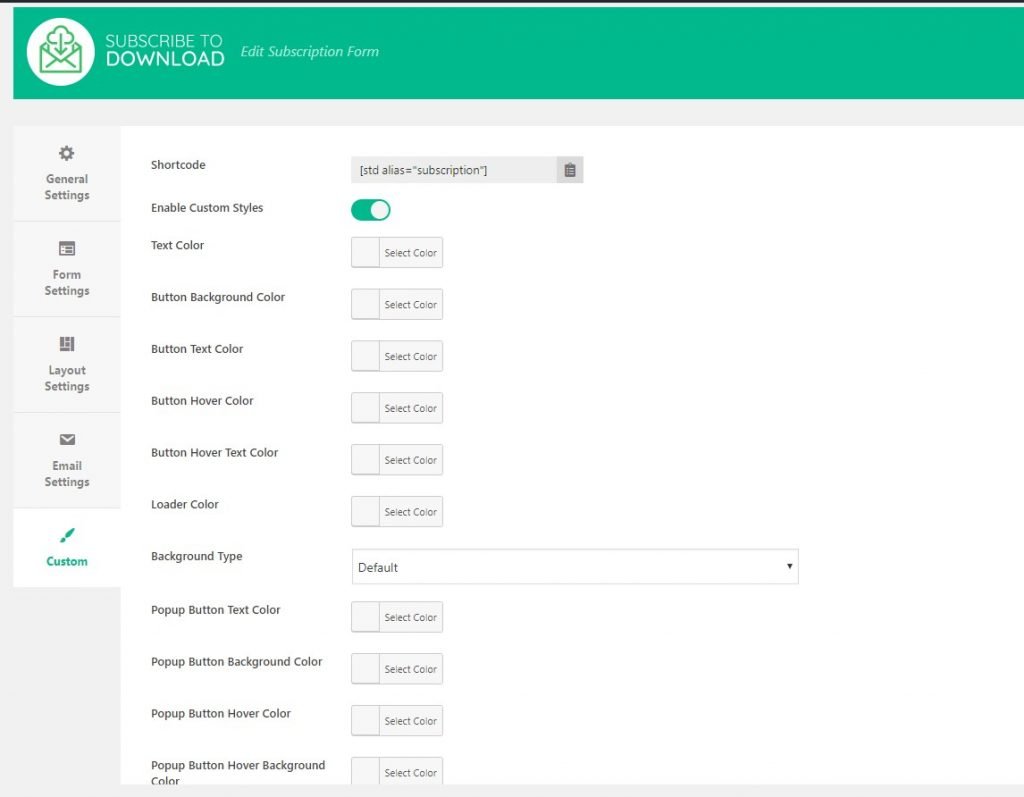
In this section you can customize the form layout through our inbuilt form layout customization options. The options available in the section comes handy when the pre designed template doesn't fulfill your needs and you want to style the form as per your need.
Here are the available customization options for the custom form styling.
- Text color - For customizing the overall text color of the form
- Button Background Color - For customizing the subscribe button background color
- Button Text Color - For customizing the subscribe button text color
- Button Hover Color - For customizing the subscribe button background color on hover
- Button Hover Text Color - For customizing the subscribe button text color on hover
- Loader Color - For customizing the loader color
- Background Type - For customizing the background of the form
- Popup Button Text Color - For customizing the text color of the popup button
- Popup Button Background Color - For customizing the background color of popup button
- Popup Button Hover Color - For customizing the popup button text color on hover
- Popup Button Hover Background Color - For customizing the popup button background color on hover
- Custom CSS - If you need to enter any custom CSS to override the existing styling of our form then you can enter in this field.
Subscribers List
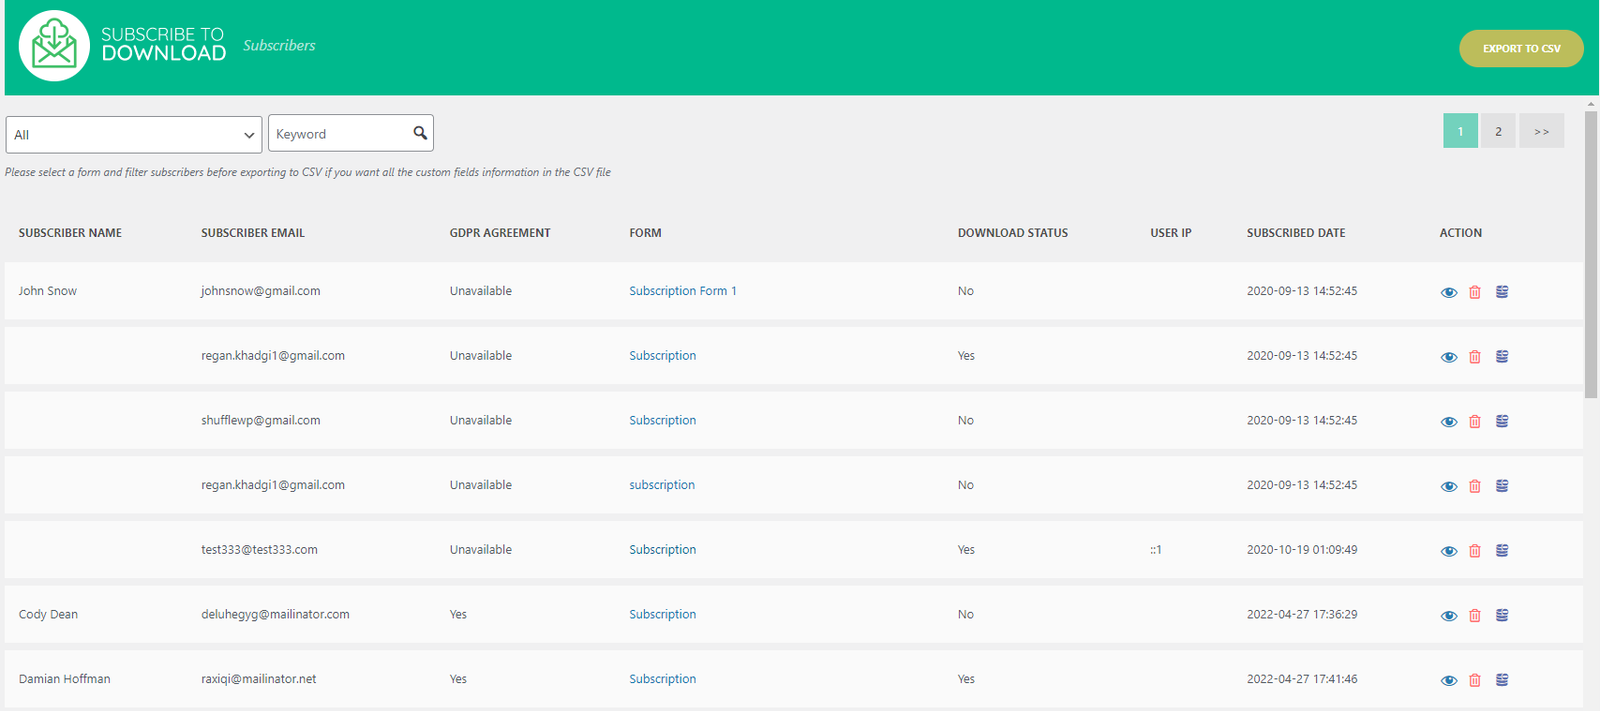
In this section, you can view all the subscribers that have subscribed through the different subscription forms and also filter the subscribers as per the different subscription forms and also export them to CSV for further external use.
Settings
In this section you can configure the Mailchimp Settings, Constant Contact Settings and some global settings.
Mailchimp Settings
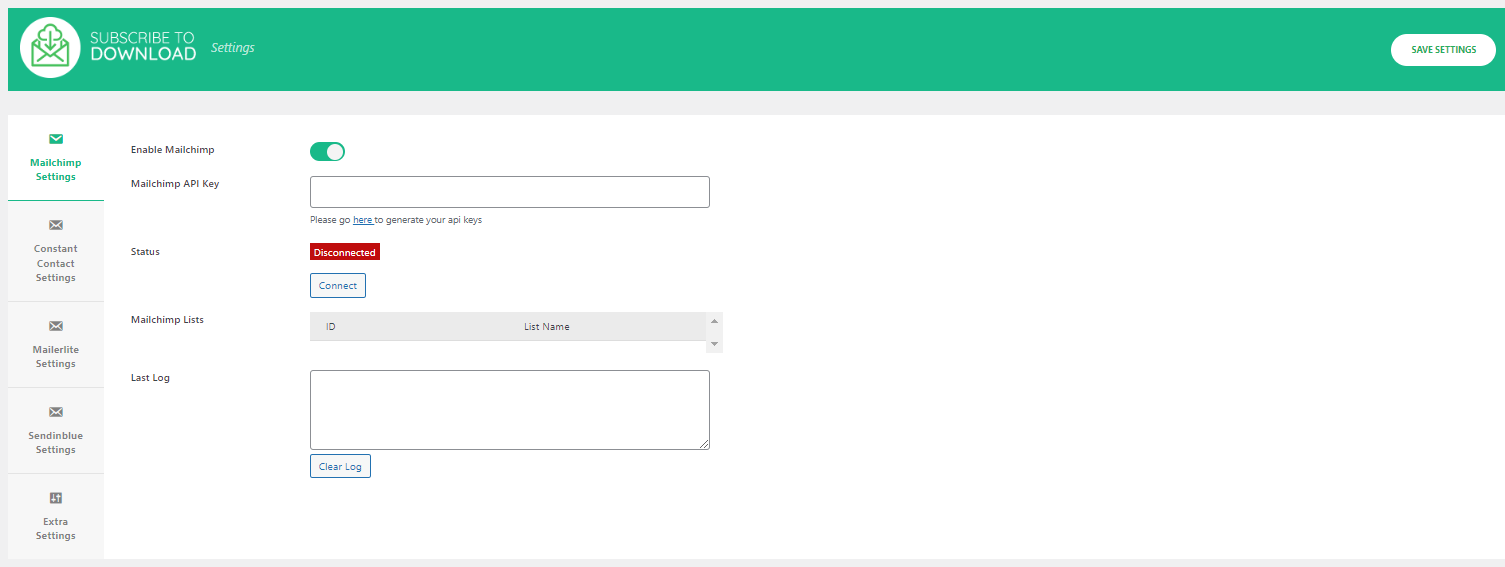
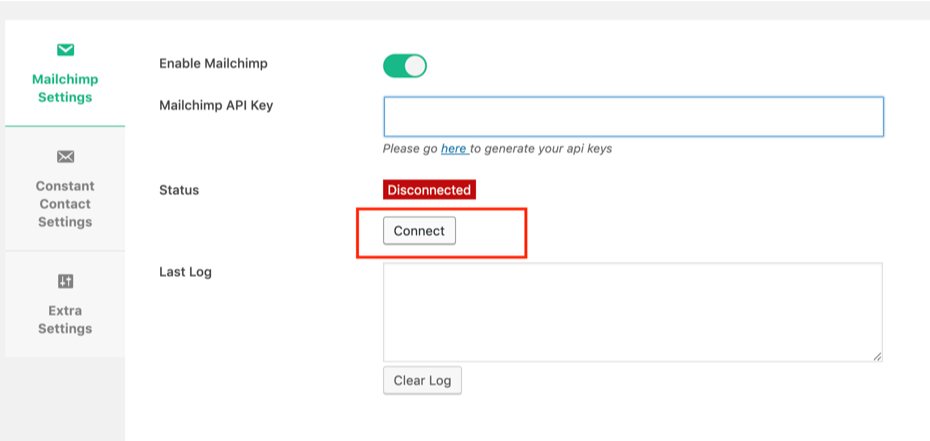
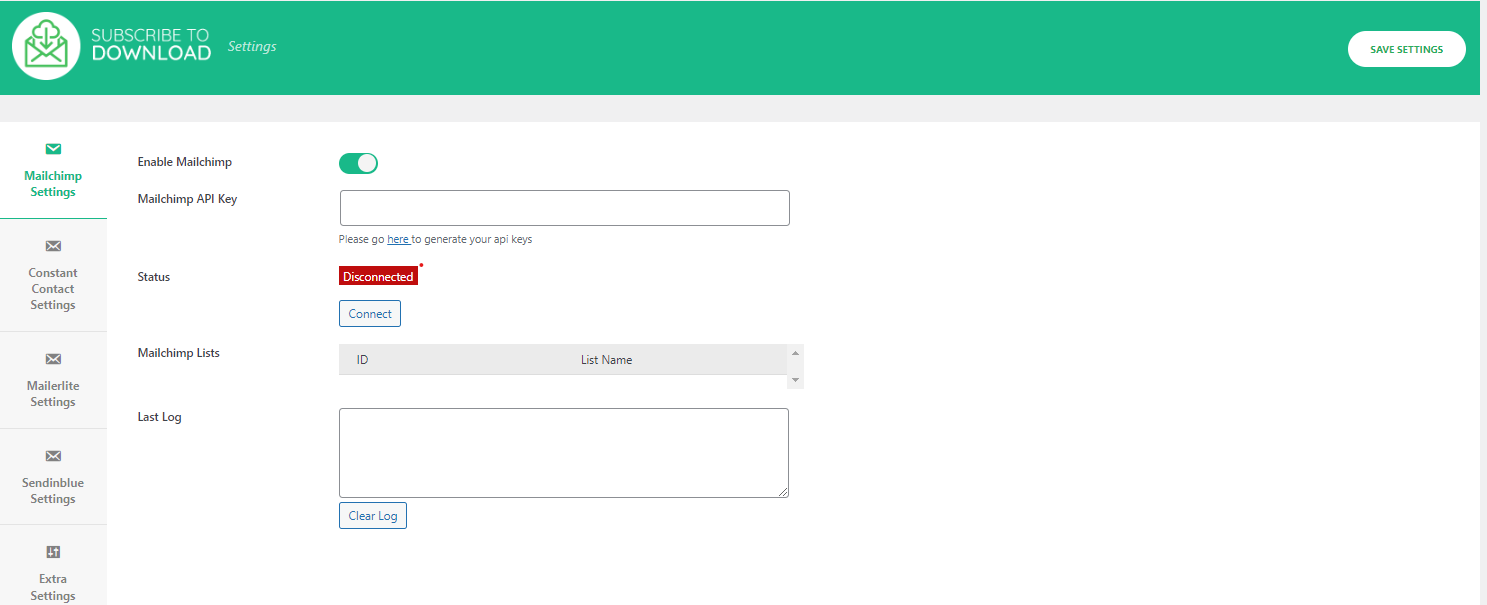
To integrate the Mailchimp in any subscription forms, Mailchimp shall be configured here. To configure Mailchimp, it will need an API key which can be generated from here.
After adding an API key, you will need to connect by clicking on connect button.
After clicking on connect, if the API key is correct then it shall fetch all the list from your Mailchimp account and show like in the below screenshot.
The Last Log field will also show the API log of the last subscription if the subscriber is sent to the Mailchimp selected list or not.
Constant Contact Settings
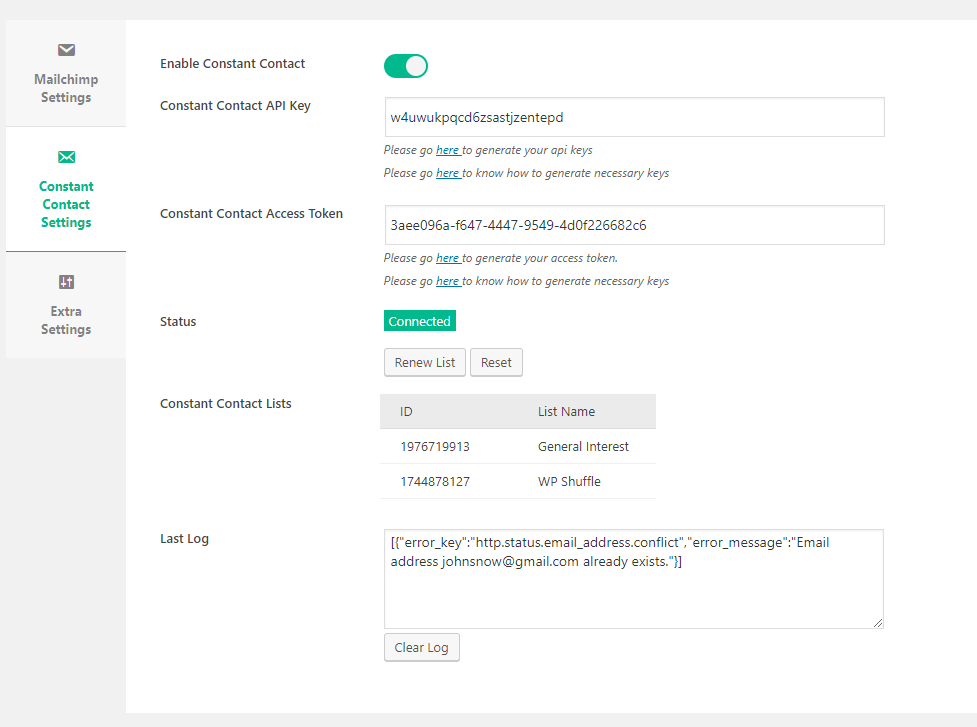
To integrate Constant Contact in the subscription forms, you will need to configure the Constant Contact necessary details in settings. For configuring the Constant Contact, it requires Constant Contact API key and Access Token.
Please go here to generate your api keys and access tokens and please go here to know how to generate necessary keys
Before connecting it shall show like below screenshot.
After connection, if both the keys are correct then it will fetch all the list available in your Constant Contact account and will show like in below screenshot.
MailerLite Settings
To integrate MailerLite in the subscription forms, you will need to configure the MailerLite necessary details in settings. For configuring the MailerLite, it requires MailerLite API key and Access Token.
Please go here to generate your api keys and access tokens and please go here to know how to generate necessary keys
Before connecting it shall show like below screenshot.
After connection, if both the keys are correct then it will fetch all the list available in your MailerLite account and will show like in below screenshot.
The Last Log field will also show the API log of the last subscription if the subscriber is sent to the MailerLite selected list or not.
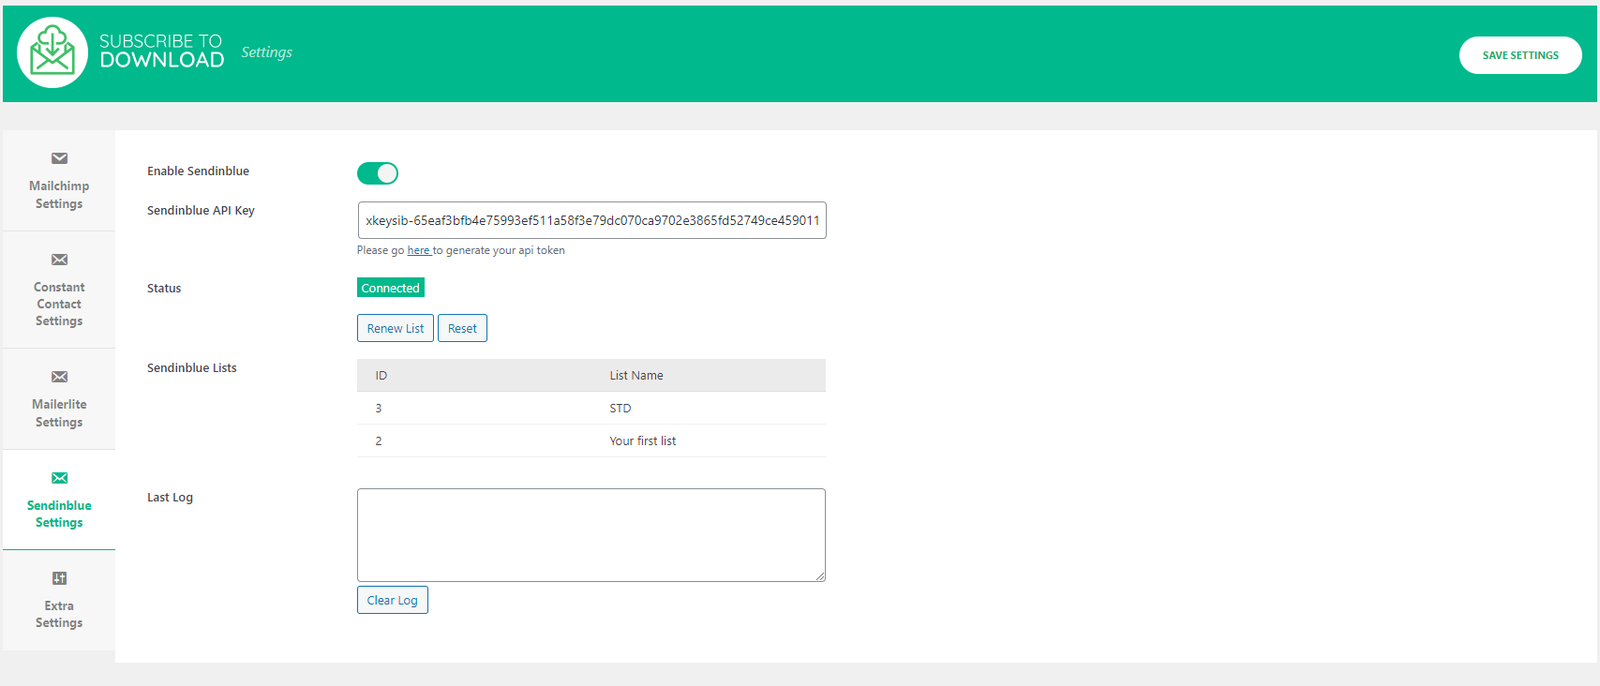
Sendinblue Settings
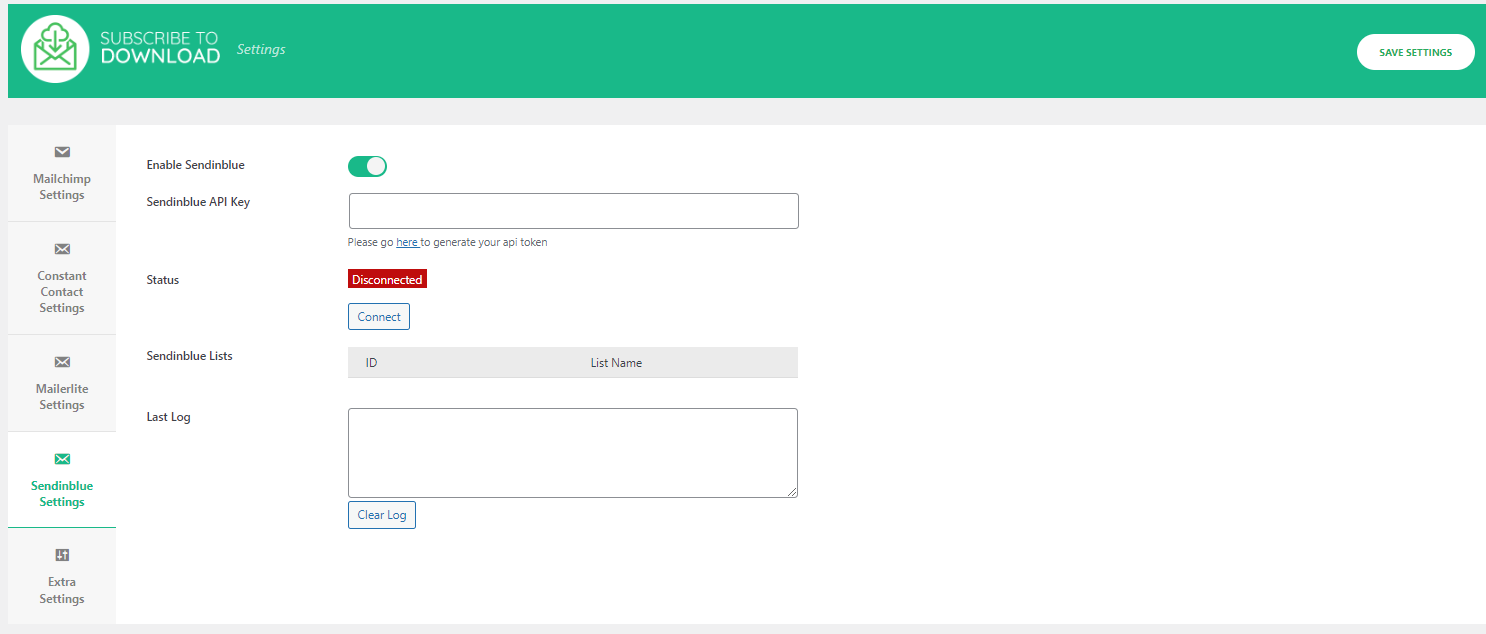
To integrate the Sendinblue in any subscription forms, Sendinblue shall be configured here. To configure Sendinblue, it will need an API key which can be generated from here.
After adding an API key, you will need to connect by clicking on connect button.
After clicking on connect, if the API key is correct then it shall fetch all the list from your Sendinblue account and show like in the below screenshot.
The Last Log field will also show the API log of the last subscription if the subscriber is sent to the Sendinblue selected list or not.
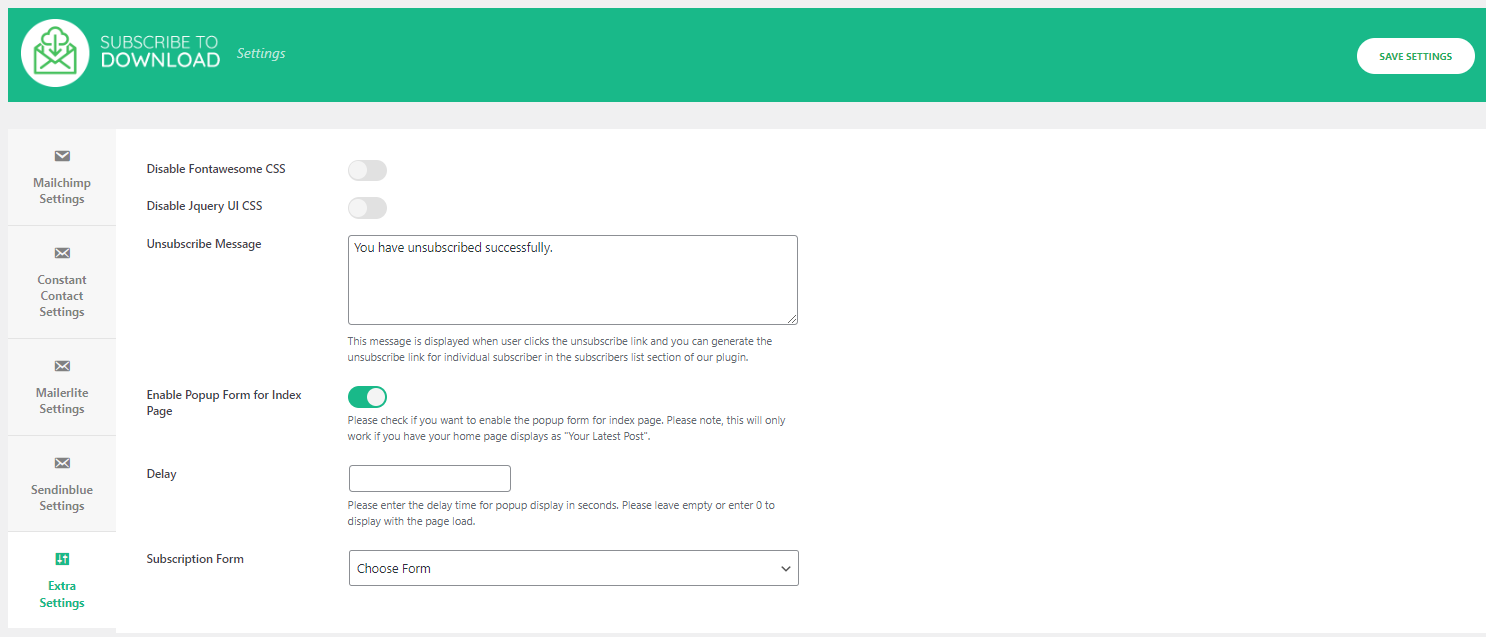
Extra Settings
1. Disable Fontawesome CSS: Check this option if you do not want the plugin to load Fontawesome CSS, typically to avoid conflicts or reduce page load times.
2. Disable jQuery UI CSS: Check this option if you do not want the plugin to load jQuery UI CSS, typically to avoid conflicts or reduce page load times.
3. Unsubscribe Message: Enter the message that users will see after they unsubscribe.
4. Enable Popup Form for Index Page: Enable a subscription form popup on the index page. This will only work if your homepage is set to display "Your Latest Posts".
5. Delay: Enter the delay time in seconds for displaying the popup form. Leave this field empty or enter 0 to display the popup form immediately upon page load.
6. Subscription Form: Select the subscription form to display.
Developer Documentation
In case you want to extend or modify any functionality in the plugin from outside the plugin using hooks and filters then we have added some necessary hooks and filters in the plugin which we have listed in detail inside the Help section of our plugin.
So if required then you can check all the available hooks and filter inside the help section of our plugin.

