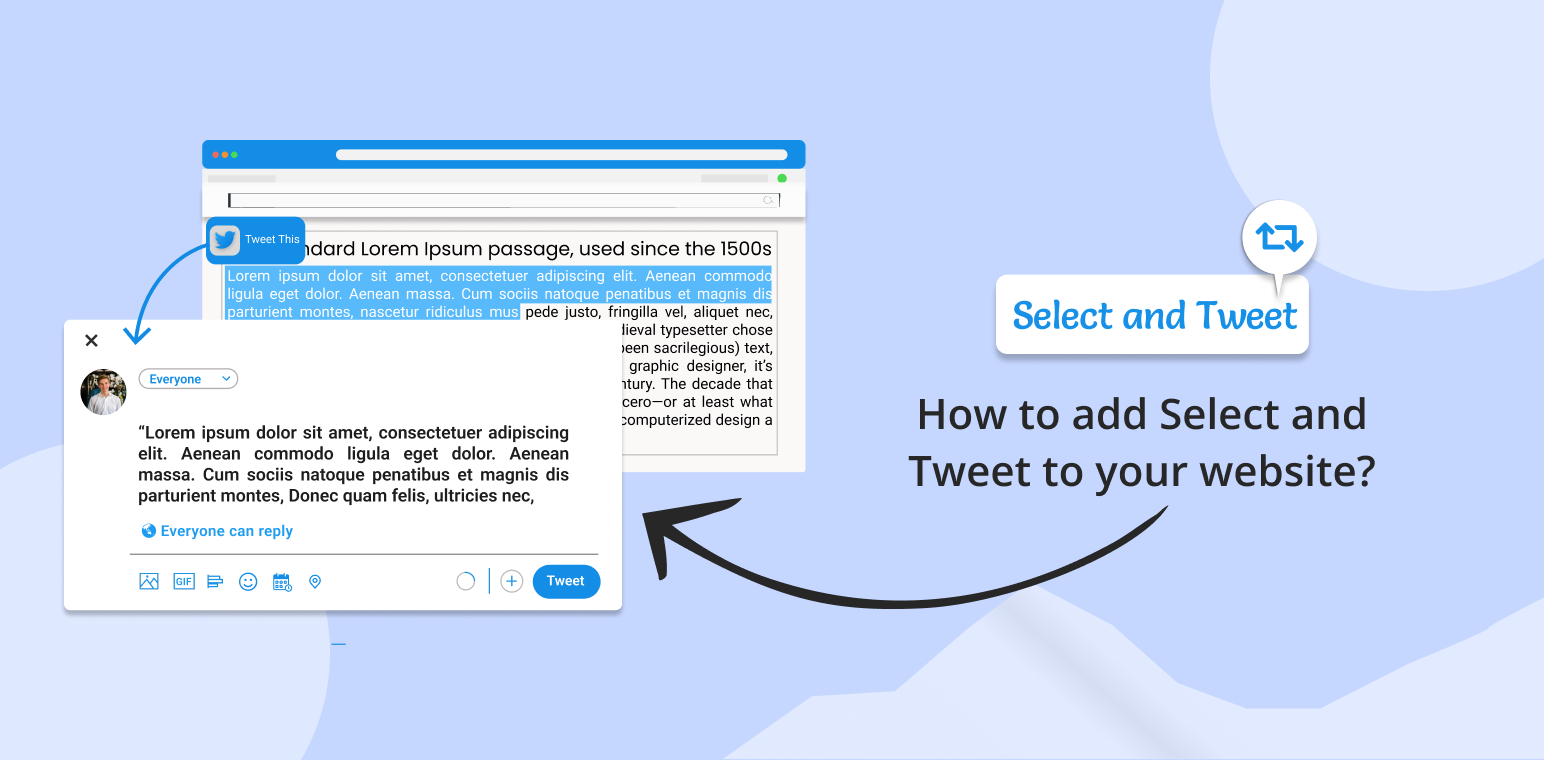
Are you looking to enhance your website’s user engagement and social media presence? Add “select and tweet” plugin to your site!
With a select and tweet plugin, you can empower your visitors to easily share specific content snippets directly to their Twitter followers with just a click.
In this guide, we’ll walk you through the steps to effortlessly incorporate this plugin into your website, amplifying your reach and fostering greater interaction with your audience.
Table of Contents
Understanding the Select and Tweet plugin
Select and Tweet plugins make it effortless for users to highlight text on a webpage and quickly share it on Twitter, complete with a preset message and link.
This smooth integration streamlines the sharing experience for visitors, motivating them to distribute your content across their social circles.
These plugins usually come with customization features, letting you adjust the appearance and functionality of the tweet button to match your website’s style and branding.
Let’s dive in and unlock the potential of select and tweet functionality for your online presence.
How to add select and tweet plugin in your website?
To add the free Select and Tweet plugin to your WordPress site, please follow these instructions:
1. Sign in to your WordPress website.
After logging in, you will be redirected to your Dashboard.
2. Navigate to ‘Plugins’.
On the left-hand side of the screen, you’ll find a menu. Select ‘Plugins’ from this menu.
3. Search for ‘Select and Tweet’.
Click on ‘Add New’ located near the top of the screen, then type ‘Select and Tweet’’ into the search bar.
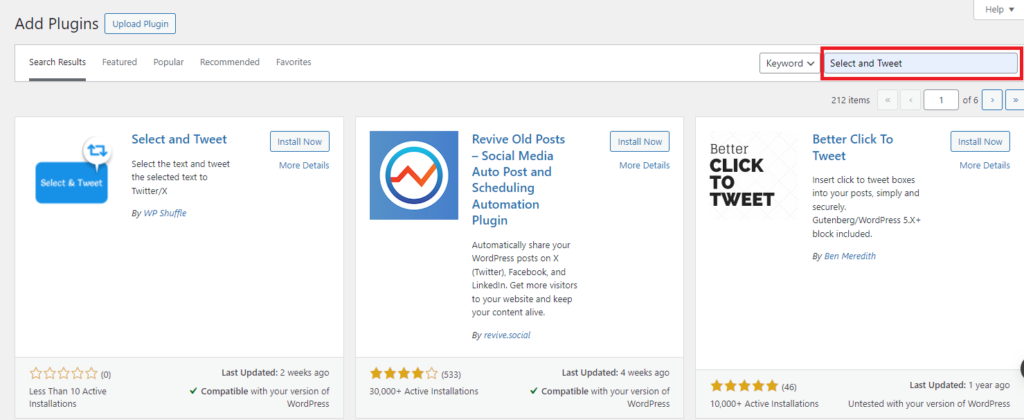
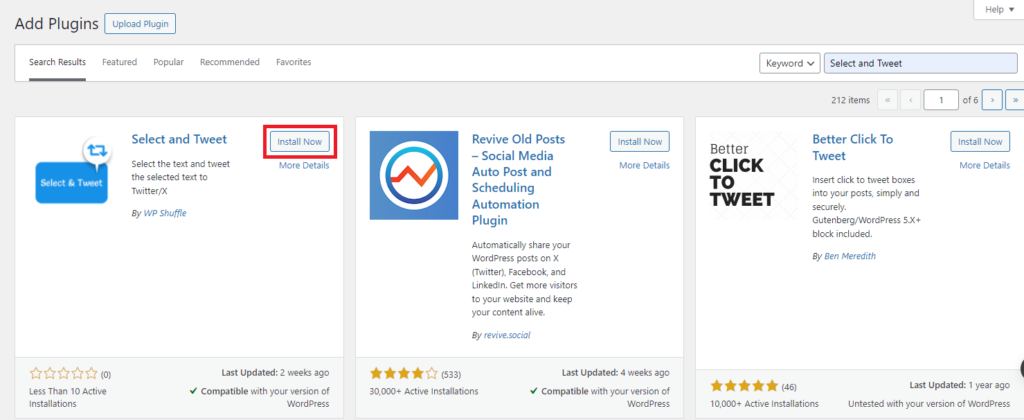
4. Install the plugin.
After searching, you’ll see a list of results. Locate the Select and Tweet plugin and click on ‘Install Now’ to begin the installation process.
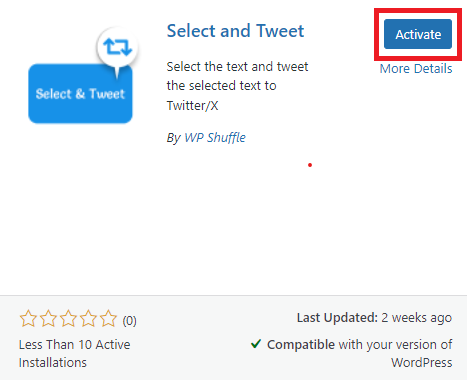
5. Activate the plugin.
Once the installation is complete, click on the ‘Activate’ button that replaces the ‘Install Now’ button.
6. Setup complete!
You’re all set to configure the plugin according to your preferences.
How do I use the select and tweet plugin on a website?
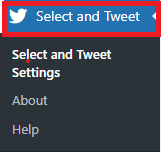
After successfully installing and activating the plugin, you’ll see a select and tweet plugin added to the left admin menu.
To access the plugin’s settings page, simply click on “Select and tweet”. From there, you can configure and customize the select and tweet plugin to suit your preferences.
Following that, you’ll proceed to the Select and Tweet dashboard, where you’ll encounter two distinct sections for settings.
- Basic Setting
- Layout Setting
Basic Setting
In basic settings, you can configure all the basic settings such as Status, and Tweet Options.

By default, the status is set to disabled. To showcase a section, you must enable that option.
To enable the “Status” option, you need to click on the toggle switch or button beside it. This will activate the “Status” feature and provide additional options.
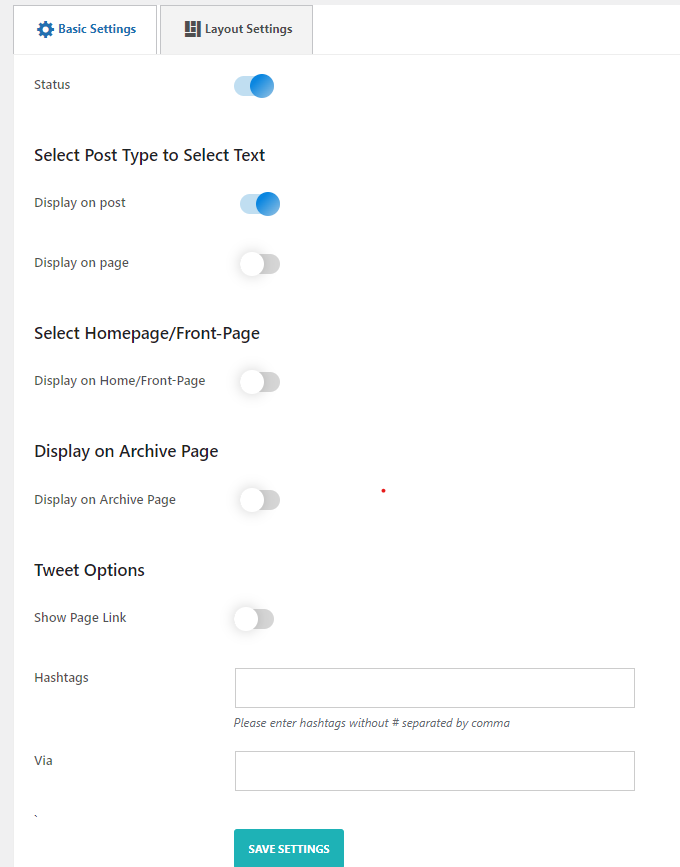
You can configure the settings once you have enabled the “Status” option.
If the “Status” is enabled, you will now see the “Select Post Type to Select Text”, “Select homepage/Fronte-page”, “Display on Archive Page”, and “Tweet” options.
- Post Type Option: Configure post types such as posts, pages, and any other registered custom post types.
- Display Page Option: Enable display options for homepage and archive pages.
- Tweet Options: Customize tweet settings including displaying the current page link status, specifying custom hashtags, and setting the website URL via attribution.
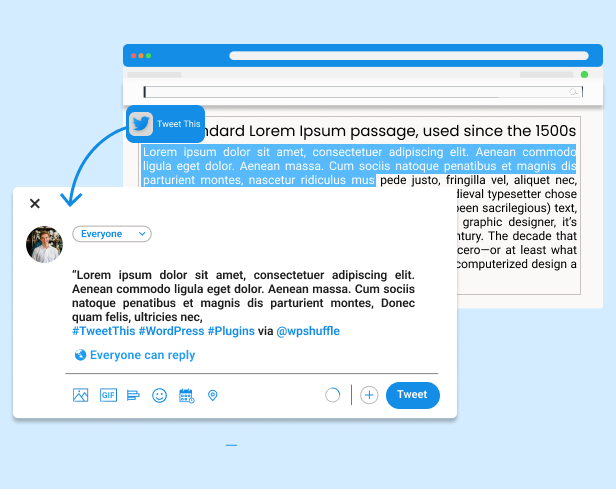
Now, enable the option on which page or post you want to display the select and tweet. After enabling the option, the Twitter icon will appear on the page or post when you highlight the text and share the tweet by clicking on the icon.
Following that, by default, the Tweet option will have the show page link disabled. To display the page link, you need to enable that option.
Next, In the “Hashtags” input field, input your desired hashtags without including the “#” symbol, and separate them with commas.
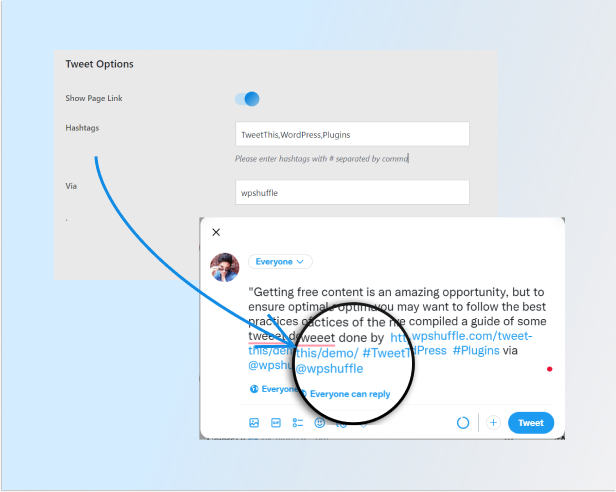
Next, find the “Via” option, where you can enter the Twitter account name to include a “Via” attribution.
After that click on “Save Setting”.
Now, we’ll navigate to the “layout settings”.
Layout Setting
In this section, you can configure the necessary settings related to the layout. You can choose any one template from our 2 beautiful pre-designed templates.
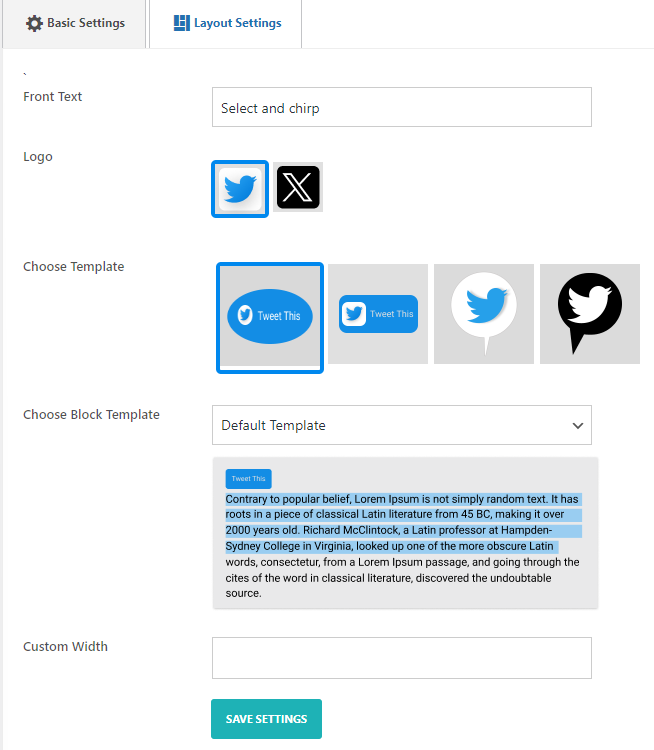
- Front Text: There is an option to input or edit front text for the content.
- Logo: An option to upload or select a logo to be displayed is available.
- Choose Template: Users can select from a variety of templates to customize the appearance.
- Choose Block Template: More specific template options are available for certain content sections. There are two templates available.
- Custom Width: Users can modify the width of the content to fit their preferences.
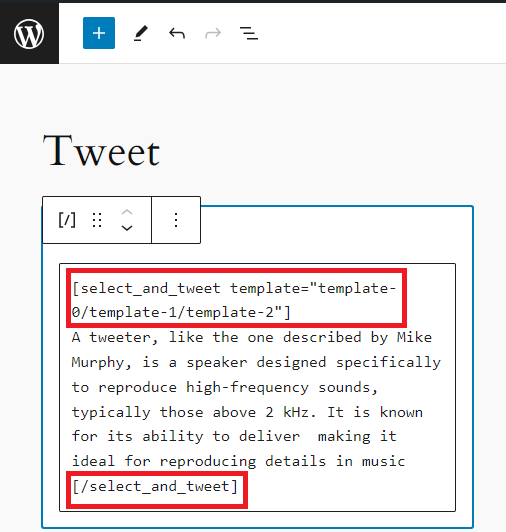
- Shortcode: To utilize the block quote template, wrap the text with our shortcode in the following manner:
[select_and_tweet template=”template-0/template-1/template-2″]
The Text you want to show
as block quotes with
tweet icon
[/select_and_tweet]
After enabling all these fields click on “Save Setting”.
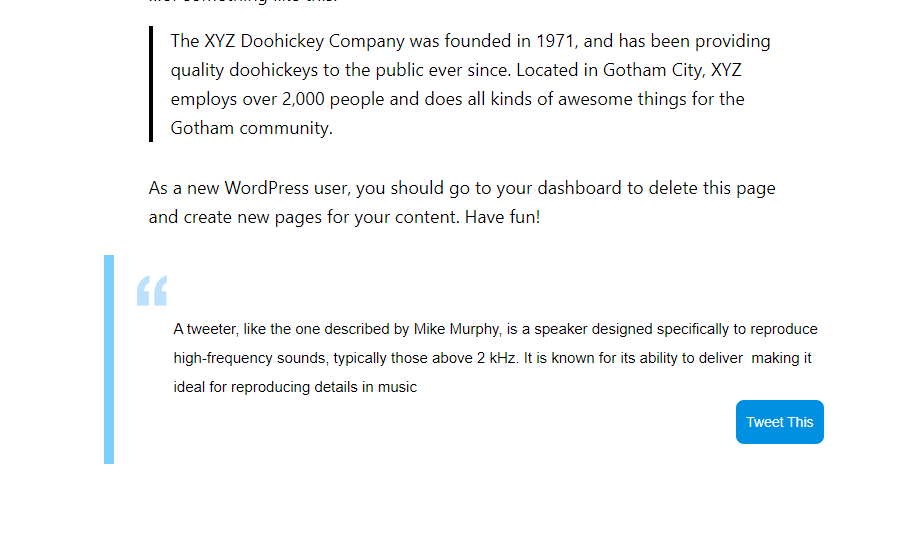
You can copy and paste a shortcode inside the post, page, or other pages.
After using the shortcode, this is how it looks in the front end.
Conclusion
Certainly! Adding a Select and Tweet plugin to your website enables users to effortlessly share specific content on Twitter with just a click, boosting engagement and social media presence. By following the steps outlined in the guide, you can seamlessly integrate this plugin into your WordPress site and customize its settings to match your branding. With features like enabling tweet options and choosing from pre-designed templates, you can enhance user experience and encourage social sharing, ultimately expanding your online reach and fostering greater interaction with your audience. Incorporating a Select and Tweet plugin is a simple yet effective way to maximize the impact of your website’s content in the digital realm.