If you want to enhance the accessibility of your WooCommerce store, the Floating Side Tab Pro plugin is an excellent tool. It allows you to display WooCommerce products in a side-tabbed menu, making it easier for visitors to browse products without leaving the page. This seamless shopping experience can encourage higher engagement and conversions.
In this guide, we’ll show you how to display WooCommerce products in Floating Side Tab Pro, including how to set up the product tab, customize layouts, and ensure your products are easily visible to your audience. Whether you want to showcase specific categories or adjust the layout for better visibility, Floating Side Tab Pro provides multiple customization options to fit your store’s needs.
This might be your guide in enhancing the functionality of your site for better accessibility and a more user-friendly way to shop. Set up and display your WooCommerce products with the help of the Floating Side Tab Pro plugin by following the steps below.
Table of Contents
Step 1: Install and Configure WooCommerce
Before you can display WooCommerce products in the Floating Side Tab Pro, you need to ensure that the WooCommerce plugin is installed and products are added to your store. Create your WooCommerce products by following the available fields and options within the plugin, ensuring that all necessary data, like product name, description, price, and images, is filled in.
Once you have added products to your store, they will be available to display in the Floating Side Tab Pro plugin.

Step 2: Open Floating Side Tab Pro Settings
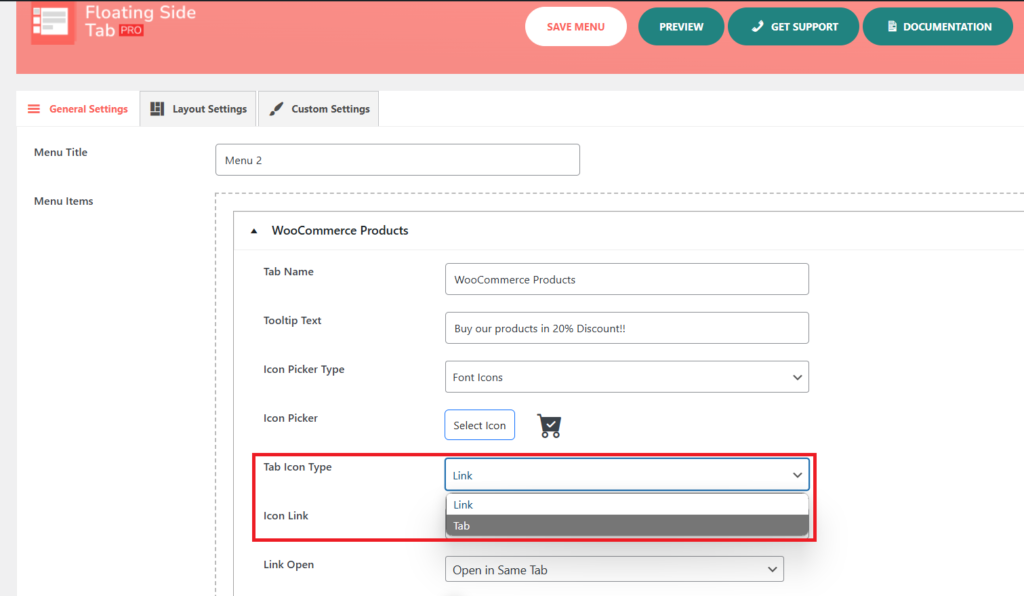
Log into your WordPress dashboard and navigate to the Floating Side Tab Pro plugin settings. This is where you can configure the behavior of the side tab and ensure it displays the WooCommerce products properly. In the settings panel, find the Tab icon type section, where you will configure how the side tab behaves and what content it will show.

Step 3: Set Up the WooCommerce Product Tab
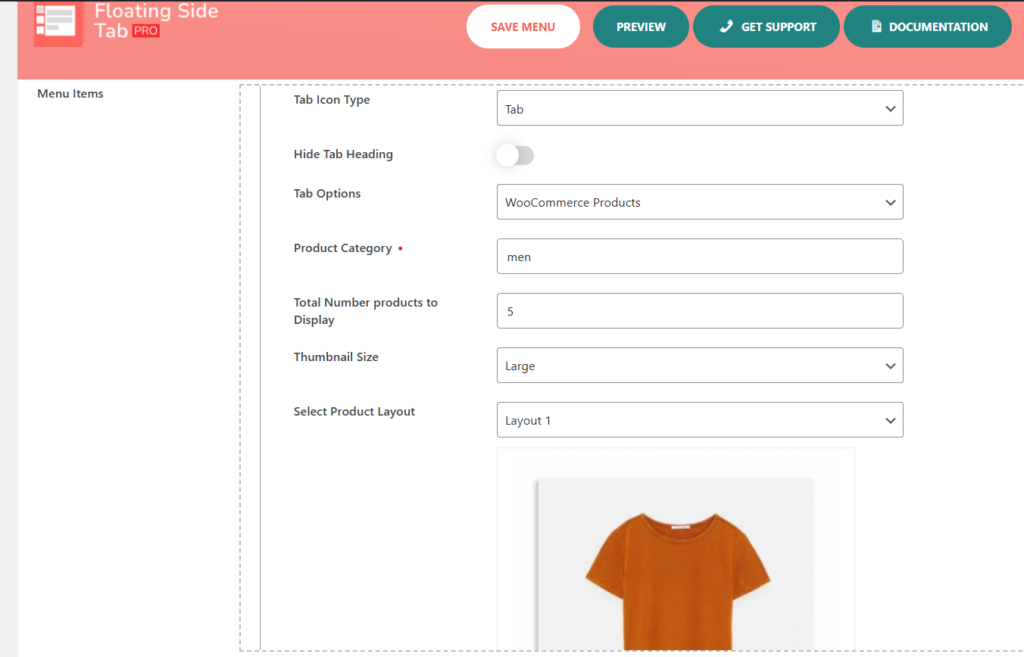
Now, it’s time to set up the WooCommerce product tab in the Floating Side Tab Pro plugin. In the Tab option, choose WooCommerce Products from the drop-down menu. This will enable the customization options related to displaying your products.

Product Category
You can choose specific product categories to display in the Floating Side Tab Pro. For instance, if you want to show men’s clothing, simply select the Men category from the available options. You can select multiple categories or just one, depending on how you want to highlight your products.
Total Number of Products to Display
Here, you can specify how many products you want to show in the floating side tab at a time. For example, if you want to display 5 products, set this value accordingly. This helps you manage the display, especially when you have a large number of products in your store.
Thumbnail Size
Next, select the thumbnail size for your products: Small, Medium, or Large. The size you choose will determine how large the product images appear in the Floating Side Tab Pro. This ensures the images look clear without taking up too much space on the tab.
Product Layout Selection
Floating Side Tab Pro offers several product layouts to present your WooCommerce products. Choose the layout that best suits your store’s theme and design preferences. Each layout option will display your products in different ways, allowing you to find the most effective layout for showcasing your WooCommerce products.
Step 4: Save Your Changes
Once you’ve configured your settings, click the Save button to apply your changes. This will update the Floating Side Tab with the selected WooCommerce product categories, display settings, and layout preferences.
Step 5: Preview and Test
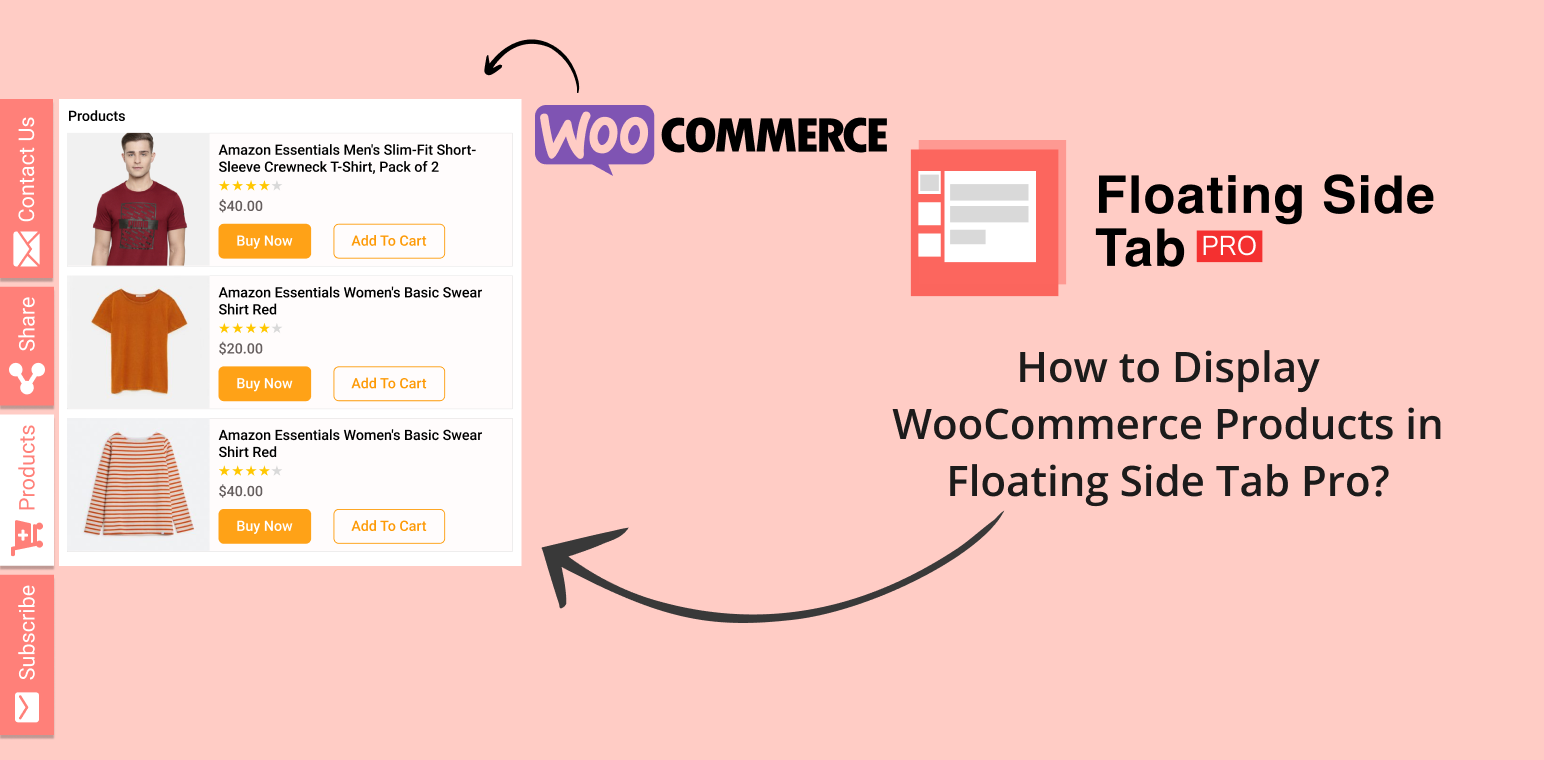
Once your settings are saved, preview the changes by visiting your site’s front end. Check the Floating Side Tab to ensure your WooCommerce products are displayed as expected. Make sure the product images, descriptions, and action buttons (like “Buy Now” or “Add to Cart”) are all functioning correctly.
Conclusion
By following the steps outlined in this guide, you can easily display WooCommerce products in the Floating Side Tab Pro. This feature enhances your site’s accessibility, allowing customers to browse products without interrupting their browsing experience. By showing your WooCommerce products in a floating tab, you create a more dynamic, user-friendly shopping environment, potentially increasing engagement and sales.
Now that you know how to set up a WooCommerce product display in Floating Side Tab Pro, start showcasing your best products and keep them front and center for your visitors.

