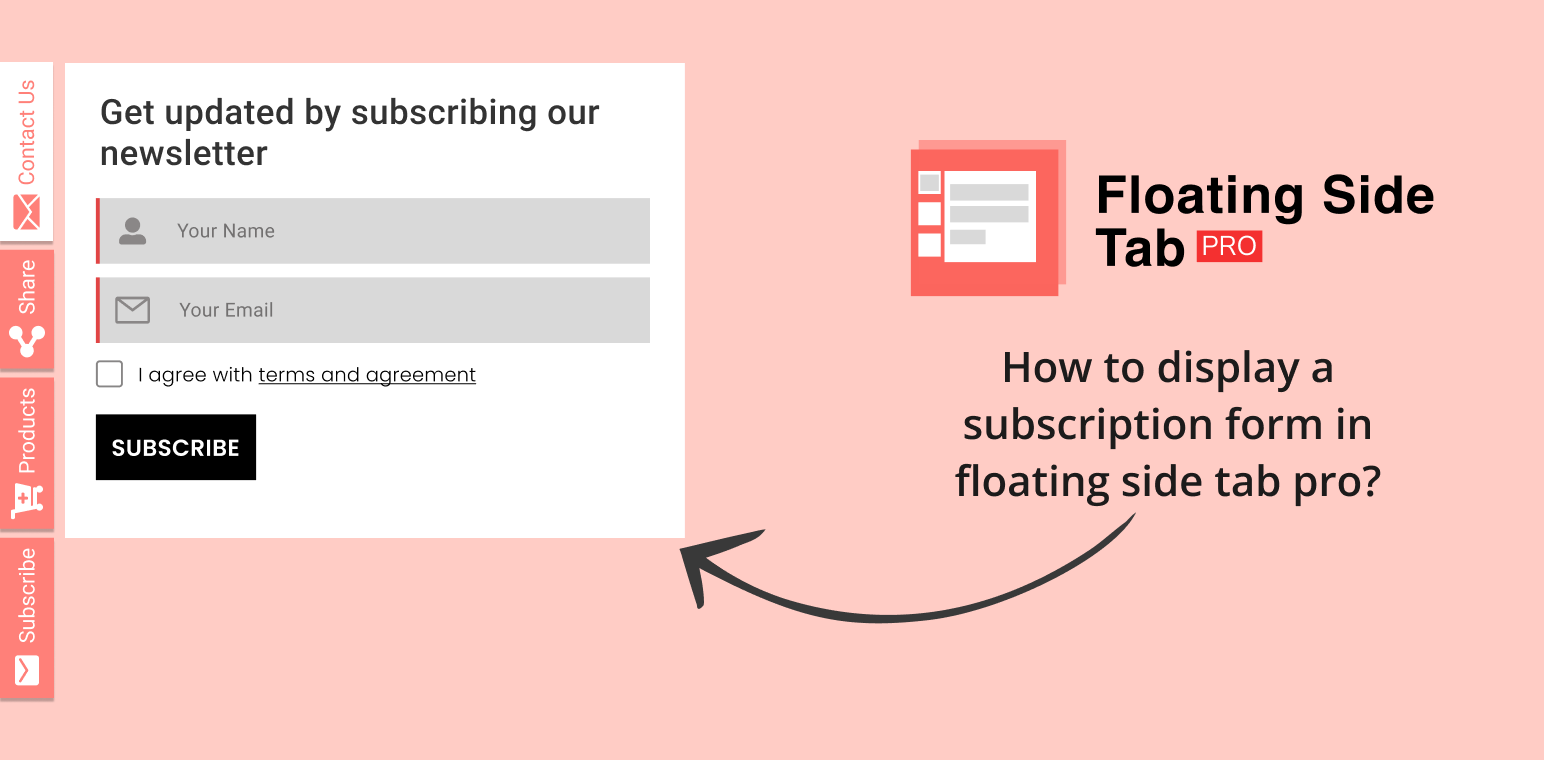
If you’re looking to boost user engagement on your website, adding a subscription form in a floating side tab is an excellent way to keep your audience connected. The Floating Side Tab Proplugin allows you to display a subscription form in a floating side tab, making it easily accessible to your visitors without interrupting their browsing experience.
In this article, we’ll walk you through how to display a subscription form in Floating Side Tab Pro, so you can grow your email list and stay connected with your audience.
Display a subscription form in floating side tab pro
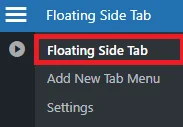
First, log into your WordPress dashboard and navigate to Floating Side Tab Pro from the plugin settings menu. This will allow you to access the customization options for setting up your subscription form.
Click on “Floating Side Tab” to see the dashboard of the floating side tab.
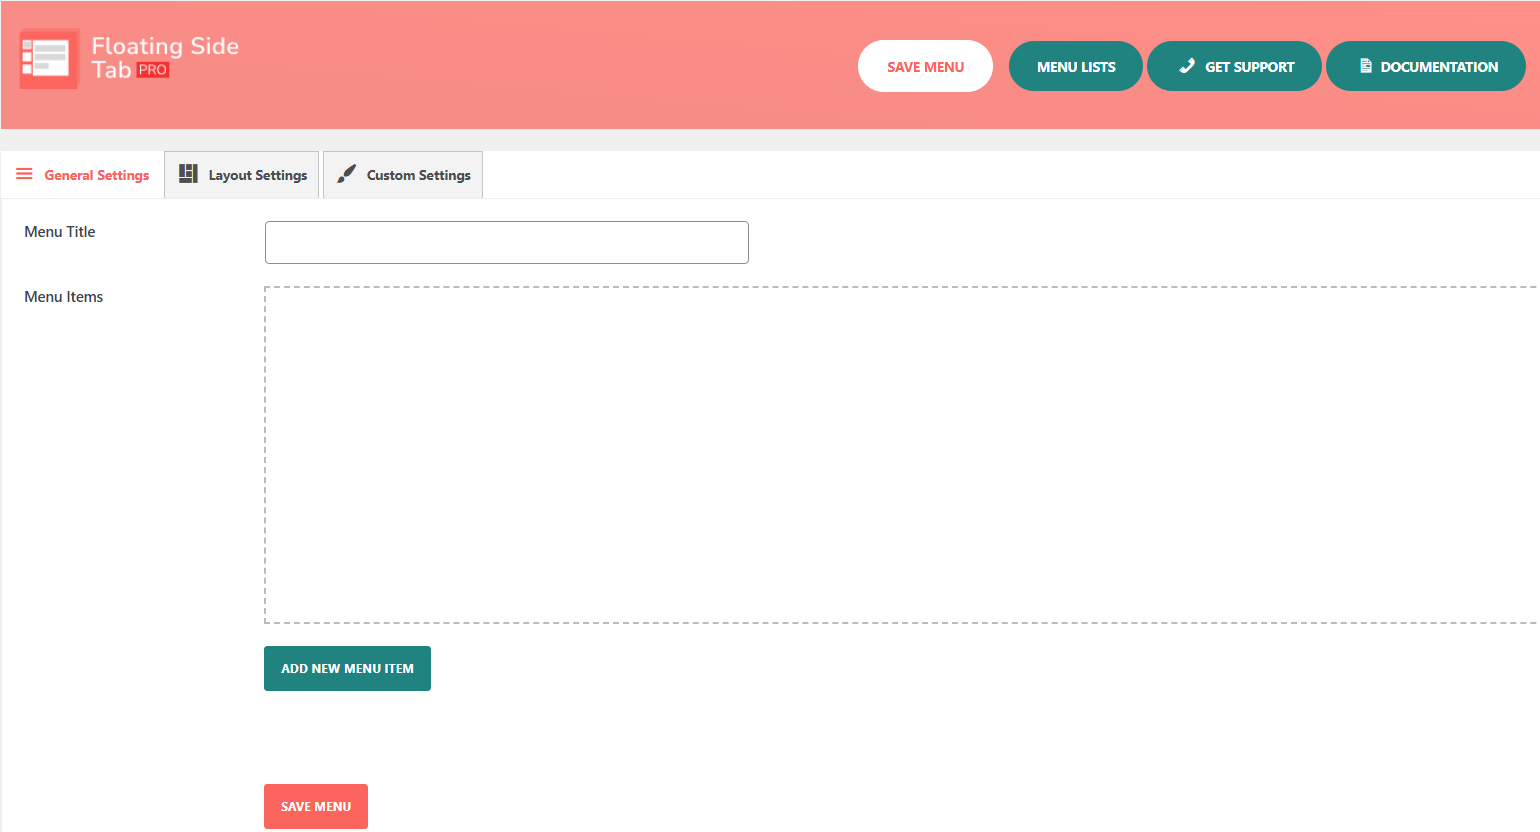
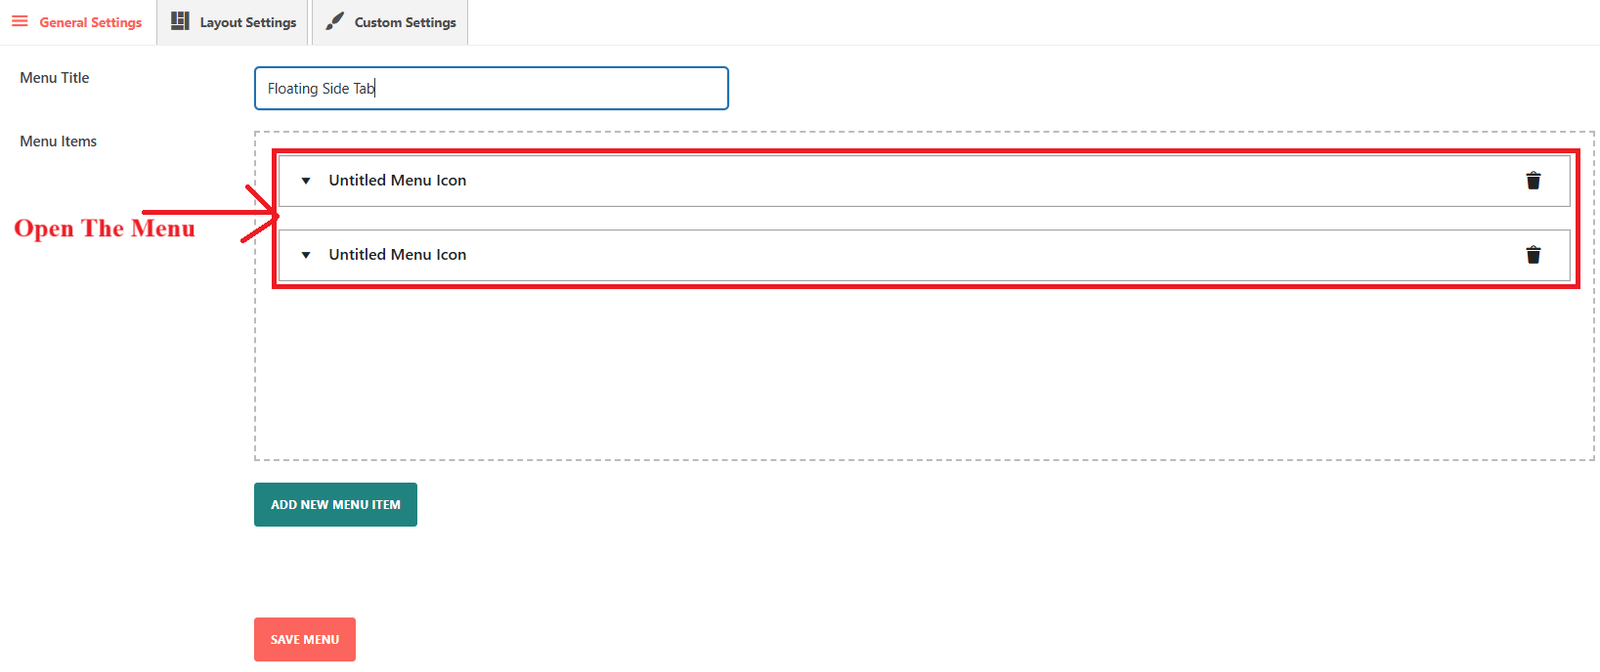
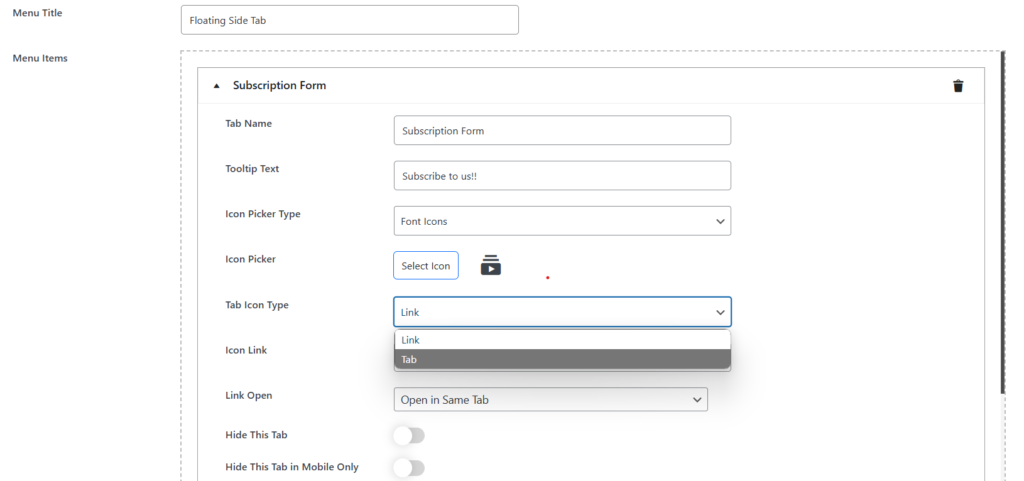
This will open you up to the Untitled Menu Icon section where you can personalize your new tab.
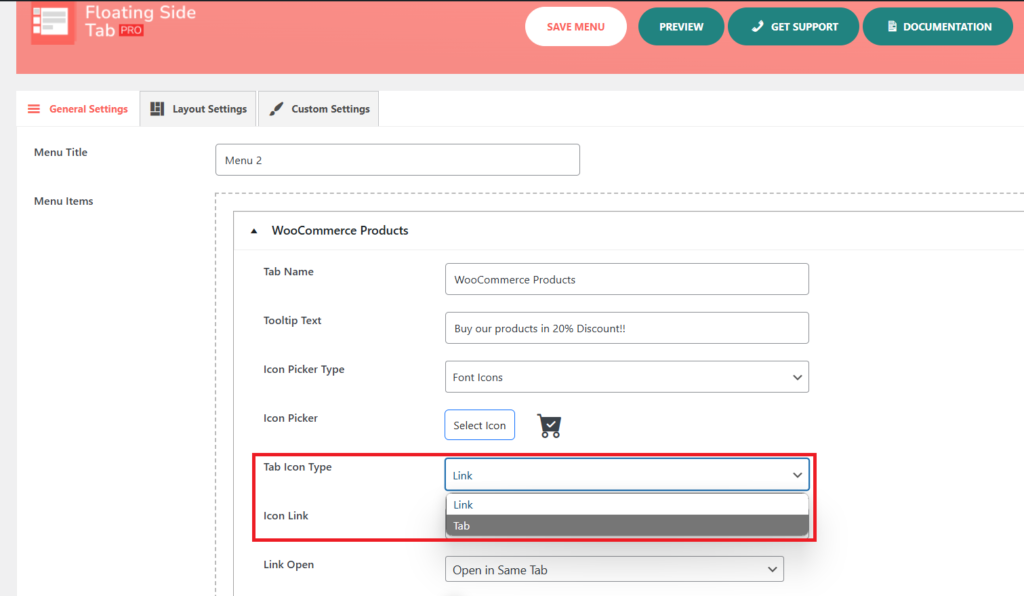
You will find a few options in this section, including the Menu Icon Type. Tab is what you want to use as the icon for this tab. Once the tab icon option is chosen, new fields allow you to customize your tab further.
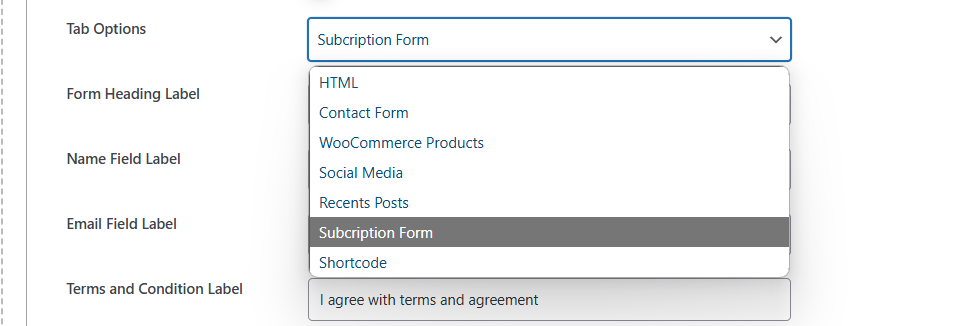
Among the available choices are HTML, Contact Form, WooCommerce Products, Subscription Form, Recent Posts, and Shortcode.
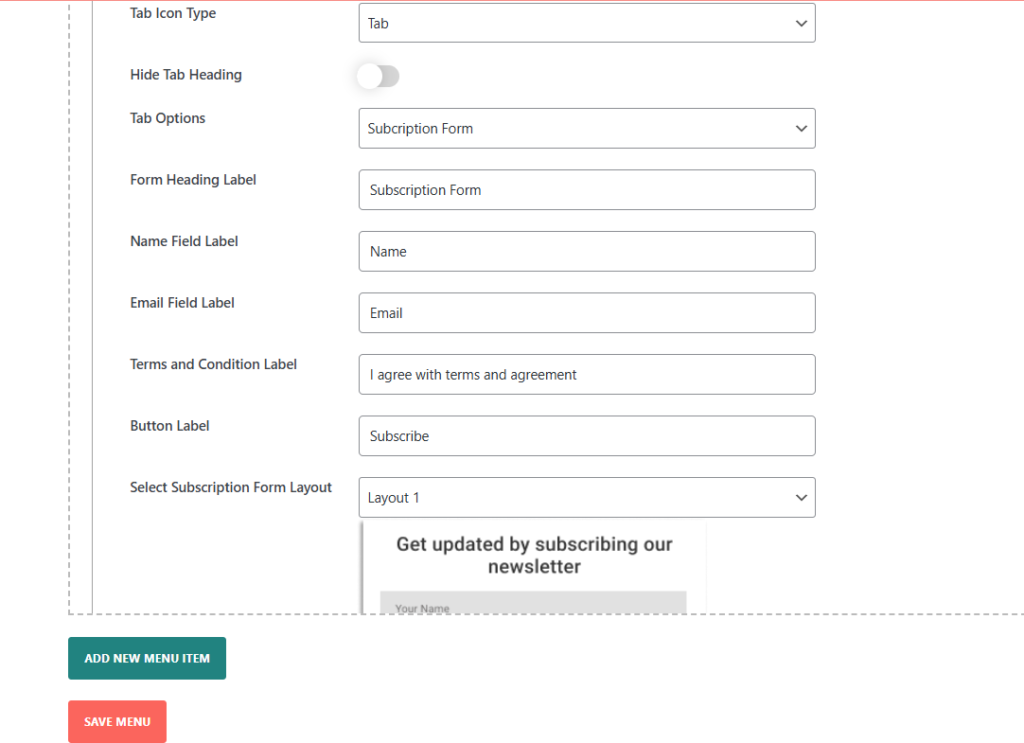
In this drop-down menu, select Subscription Form. Once you select it, a new set of fields will appear with which you can customize your subscription form.
You can configure the Form Heading Label, Name Field Label, Email Field Label, and many other basic settings. With this type of configuration, your form is optimized for your audience, which increases performance.
Save and Preview
Once all settings are configured, click Save to confirm your changes. Finally, preview your site to ensure that the Floating Side Tab now includes your subscription form tab with the selected settings.
By following these steps, you will be able to easily show a subscription form on your Floating Side Tab Pro, so visitors may interact with your content and sign up for updates.
Conclusion
Adding a subscription form with Floating Side Tab Pro is a simple, effective way to connect with your audience and boost sign-ups. With this easy setup, your subscription form stays visible and accessible without interrupting visitors’ browsing. This approach helps you grow your subscriber base while keeping your site user-friendly, giving visitors a convenient way to stay updated and engaged with your latest content.
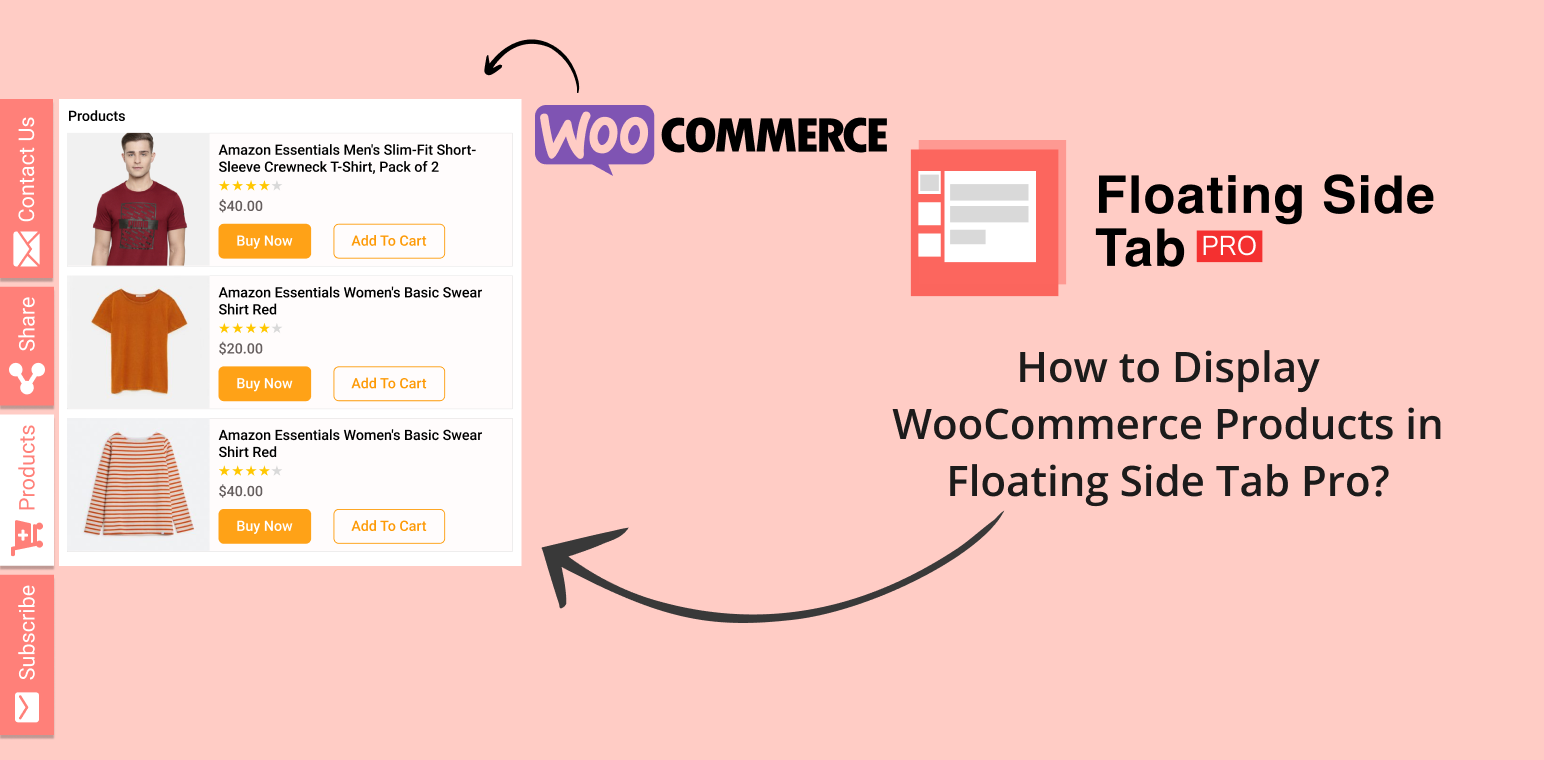
If you want to enhance the accessibility of your WooCommerce store, the Floating Side Tab Pro plugin is an excellent tool. It allows you to display WooCommerce products in a side-tabbed menu, making it easier for visitors to browse products without leaving the page. This seamless shopping experience can encourage higher engagement and conversions.
In this guide, we’ll show you how to display WooCommerce products in Floating Side Tab Pro, including how to set up the product tab, customize layouts, and ensure your products are easily visible to your audience. Whether you want to showcase specific categories or adjust the layout for better visibility, Floating Side Tab Pro provides multiple customization options to fit your store’s needs.
This might be your guide in enhancing the functionality of your site for better accessibility and a more user-friendly way to shop. Set up and display your WooCommerce products with the help of the Floating Side Tab Pro plugin by following the steps below.
Before you can display WooCommerce products in the Floating Side Tab Pro, you need to ensure that the WooCommerce plugin is installed and products are added to your store. Create your WooCommerce products by following the available fields and options within the plugin, ensuring that all necessary data, like product name, description, price, and images, is filled in.
Once you have added products to your store, they will be available to display in the Floating Side Tab Pro plugin.
Step 2: Open Floating Side Tab Pro Settings
Log into your WordPress dashboard and navigate to the Floating Side Tab Pro plugin settings. This is where you can configure the behavior of the side tab and ensure it displays the WooCommerce products properly. In the settings panel, find the Tab icon type section, where you will configure how the side tab behaves and what content it will show.
Step 3: Set Up the WooCommerce Product Tab
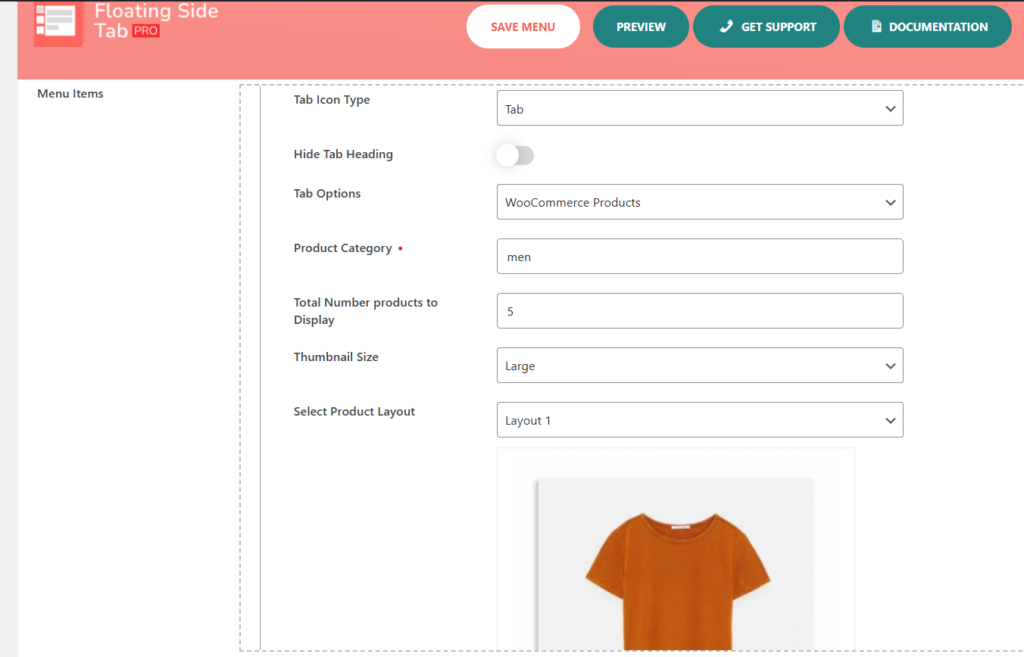
Now, it’s time to set up the WooCommerce product tab in the Floating Side Tab Pro plugin. In the Tab option, choose WooCommerce Products from the drop-down menu. This will enable the customization options related to displaying your products.
Product Category
You can choose specific product categories to display in the Floating Side Tab Pro. For instance, if you want to show men’s clothing, simply select the Men category from the available options. You can select multiple categories or just one, depending on how you want to highlight your products.
Total Number of Products to Display
Here, you can specify how many products you want to show in the floating side tab at a time. For example, if you want to display 5 products, set this value accordingly. This helps you manage the display, especially when you have a large number of products in your store.
Thumbnail Size
Next, select the thumbnail size for your products: Small, Medium, or Large. The size you choose will determine how large the product images appear in the Floating Side Tab Pro. This ensures the images look clear without taking up too much space on the tab.
Product Layout Selection
Floating Side Tab Pro offers several product layouts to present your WooCommerce products. Choose the layout that best suits your store’s theme and design preferences. Each layout option will display your products in different ways, allowing you to find the most effective layout for showcasing your WooCommerce products.
Step 4: Save Your Changes
Once you’ve configured your settings, click the Save button to apply your changes. This will update the Floating Side Tab with the selected WooCommerce product categories, display settings, and layout preferences.
Step 5: Preview and Test
Once your settings are saved, preview the changes by visiting your site’s front end. Check the Floating Side Tab to ensure your WooCommerce products are displayed as expected. Make sure the product images, descriptions, and action buttons (like “Buy Now” or “Add to Cart”) are all functioning correctly.
Conclusion
By following the steps outlined in this guide, you can easily display WooCommerce products in the Floating Side Tab Pro. This feature enhances your site’s accessibility, allowing customers to browse products without interrupting their browsing experience. By showing your WooCommerce products in a floating tab, you create a more dynamic, user-friendly shopping environment, potentially increasing engagement and sales.
Now that you know how to set up a WooCommerce product display in Floating Side Tab Pro, start showcasing your best products and keep them front and center for your visitors.
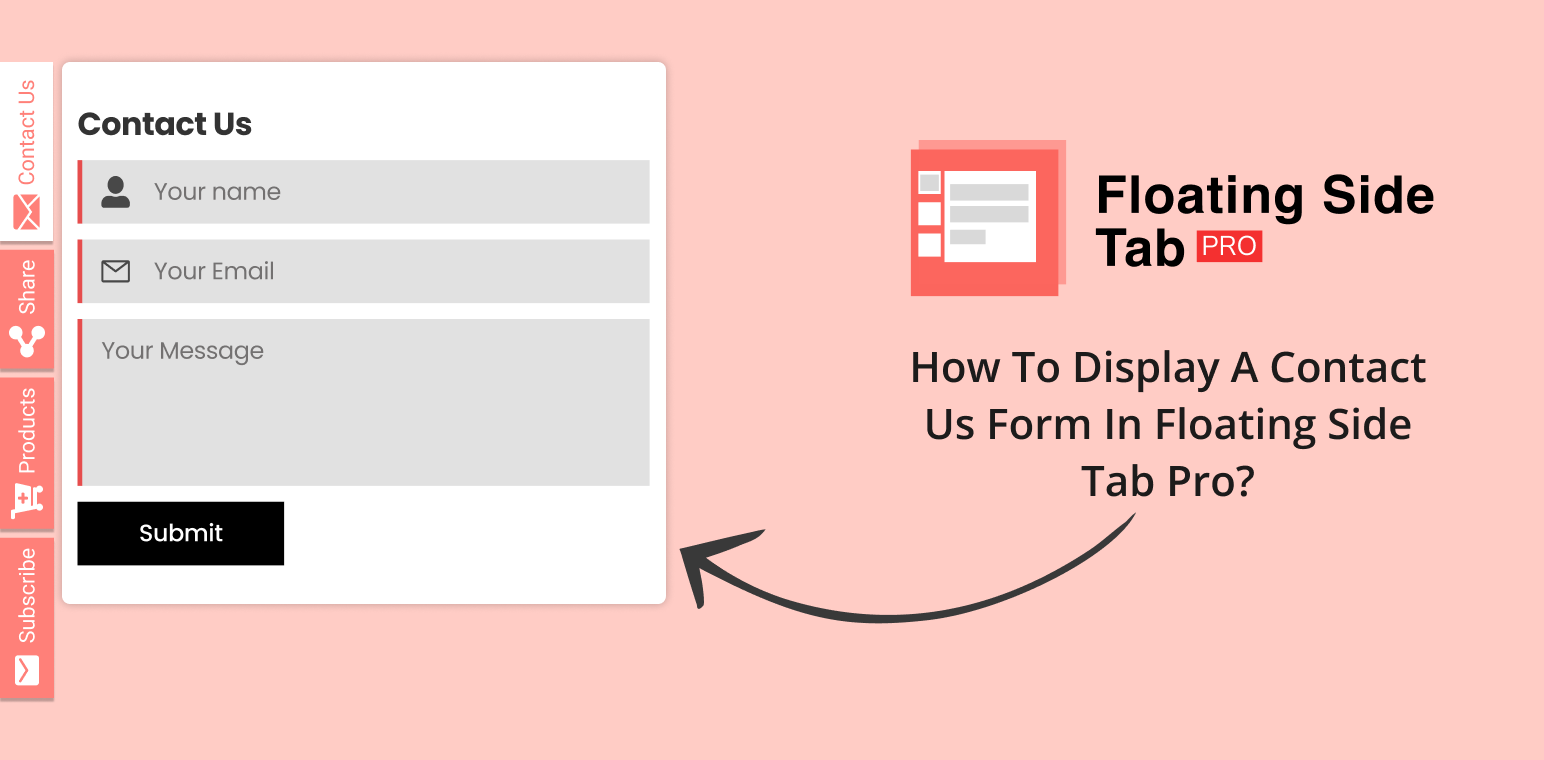
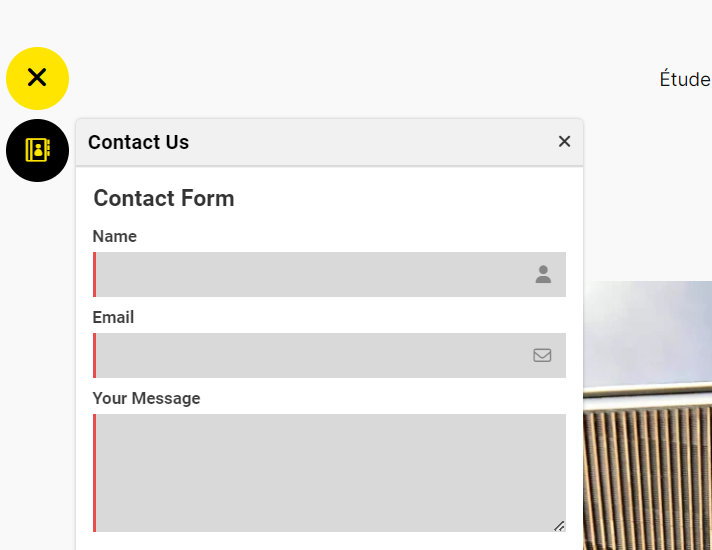
Want to make reaching out easy for your visitors? Well, the Floating Side Tab Pro plugin enables you to easily display a Contact Us form available on every page, and that’s what helps improve user engagement because it keeps a convenient contact point always within reach.
Providing visitors with an easy way to contact you can make all the difference for your website’s engagement and customer service. The Floating Side Tab Pro plugin allows you to display a Contact Us form on any page, keeping it just a click away. Besides placing the form directly inside the side tab, which makes communication so much more convenient, you’ll enhance the user experience of the site.
In this guide, we’ll walk you through the steps to set up a contact form within the Floating Side Tab Pro plugin, so you can start receiving messages and inquiries in no time. Besides placing the form directly inside the side tab, which makes communication so much more convenient, you’ll enhance the user experience of the site.
Step-by-Step Guide to Display a Contact Us Form in Floating Side Tab Pro
1. Install and Activate Floating Side Tab Pro
Purchase the Floating Side Tab Pro plugin from CodeCanyon.
After purchasing, go to your CodeCanyon account and download the plugin’s zip file.
After downloading, log into your WordPress dashboard, find Plugins > Add New, upload the downloaded zip, and click Activate.
2. Log into Your WordPress Dashboard
Log into your WordPress dashboard to access the settings for Floating Side Tab Pro.
3. Go to the Floating Side Tab Menus
In the dashboard menu, select the Floating Side TabMenus. This opens up the plugin’s settings and configuration options.
4. Add a New Tab
Click on the Add New button to create a new tab. You’ll be directed to the General Settings tab, where you can set up the tab that will contain your contact form.
5. Enter Tab Details
Tab Name: Enter a clear name, like Contact Us.
Tooltip Text: Add something inviting, such as Get in Touch!
Icon Picker Type: Choose an icon, such as an envelope, to represent the contact.
6. Select the Tab Icon Type
In the Tab Icon Type section, choose Tab to display the icon directly on the tab.
7. Hide Tab Heading (Optional) Check Hide Tab Heading if you want a minimalistic look, without displaying a heading inside the tab.
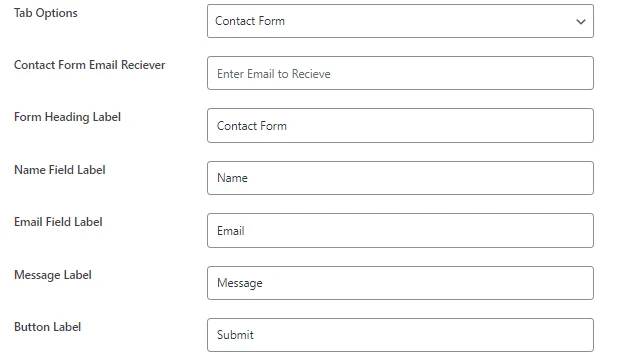
8. Tab Options – Select Contact Form Under Tab Options, choose Contact Form to customize the contact form fields directly from tab settings.
9. Configure Contact Form Settings When you select Contact Form, you’ll see additional fields to customize:
Contact Form Email Receiver: Enter the email address where you’d like to receive form submissions.
Form Heading Label: Set a heading for the form, such as Contact Us Form or Get in Touch.
Name Field Label: Customize the label for the name field, for example, Name.
Email Field Label: Enter a label like Email for the email input field.
Message Label: Set a label for the message field, such as Message or Your Message.
Button Label: Define the text for the submission button, like Submit or Send.
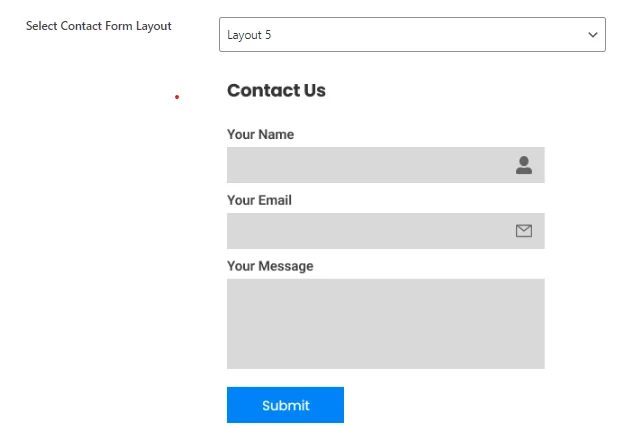
Select Contact Form Layout: Choose from five pre-designed templates to give your form. These templates allow you to match the contact form’s design with your site’s overall theme, making it visually appealing and user-friendly.
10. Layout Settings
Once your contact form is configured, you can further customize the layout of the Floating Side Tab:
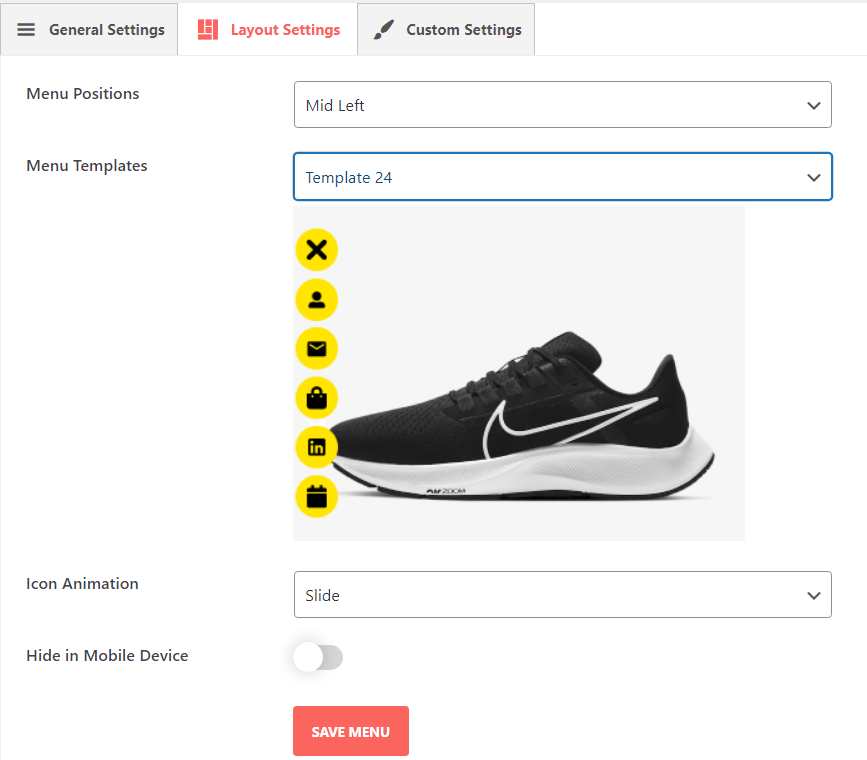
Menu Positions Choose from six different positions for the Floating Side Tab on your webpage:
Mid Left
Mid Right
Top Left
Bottom Left
Top Right
Bottom Right
This setting allows you to control the floating tab’s position on the screen, aligning it with your site’s layout and user flow.
Menu Templates With the Floating Side Tab menu, one can choose between 24 pre-designed templates to define its look and feel, saving loads of time as it is very useful in selecting pre-designed layouts without having to design icons or layout elements by hand.
Icon Animation Choose from several animation options to make the menu icons more engaging. Available animations include:
Slide
Spin-Infinity
Bounce
Zoom
Rotate
These animations add interactivity and make the Floating Side Tab more dynamic for users.
Hide on Mobile Device You can enable this option to hide the Floating Side Tab on mobile devices, improving the user experience by reducing screen clutter.
11. Save Your Settings Once you’ve finished configuring your settings, click Save. Your contact form is now live within the Floating Side Tab, ready to provide an accessible contact point for visitors on every page of your site.
Follow these steps to show the Contact Us form inside the Floating Side Tab Pro plugin easily. It would take your website to the next level by making it easy for visitors to contact you.
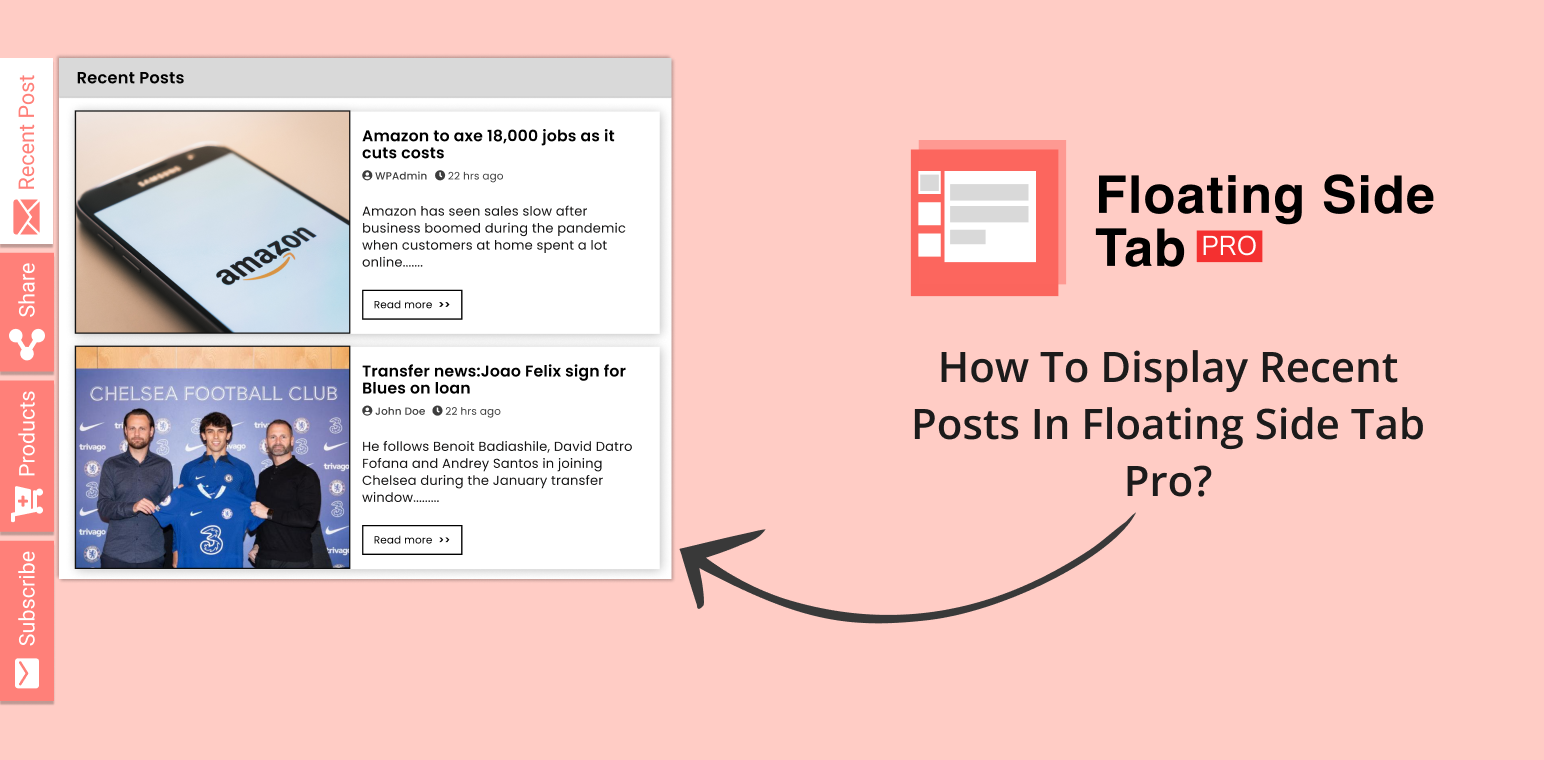
Want to make sure your visitors always see your latest blog posts? With the Floating Side Tab Pro plugin, it’s easy to display recent posts on your site, keeping your content right at their fingertips. Adding a Recent Posts tab creates the ability for readers to stay connected with your updates even while browsing around. That’s a simple way to allow them to access and be more connected to your content.
Setting it up only takes a few steps, and once you’re done, your recent posts will be showcased just the way you want. Floating Side Tab Pro makes it easy to tailor your site so readers can always stay up-to-date with what you’re sharing. It’s a simple upgrade that brings more attention to your content without any difficulty, as you can display recent post updates consistently.
Step-by-Step Guide to Setting Up the Recent Posts Tab
1. Install and Activate Floating Side Tab Pro
To get started, you’ll need to install the Floating Side Tab Pro plugin on your WordPress site.
First, purchase the plugin from CodeCanyon. After purchasing, download the plugin’s zip file from your CodeCanyon account.
Next, head to your WordPress dashboard, go to Plugins > Add New, and upload the zip file you just downloaded.
Once uploaded, click the “Activate” button to activate the plugin on your site.
With the plugin activated, you will be able to edit your settings in the Floating Side Tab Pro and add a Recent Posts tab so you can display recent post content to your visitors.
2. Go to the Floating Side Tab Menus
Once inside your dashboard, click the Floating Side Tab option in the left-hand menu to access the plugin’s settings.
3. Add New Tab Menu
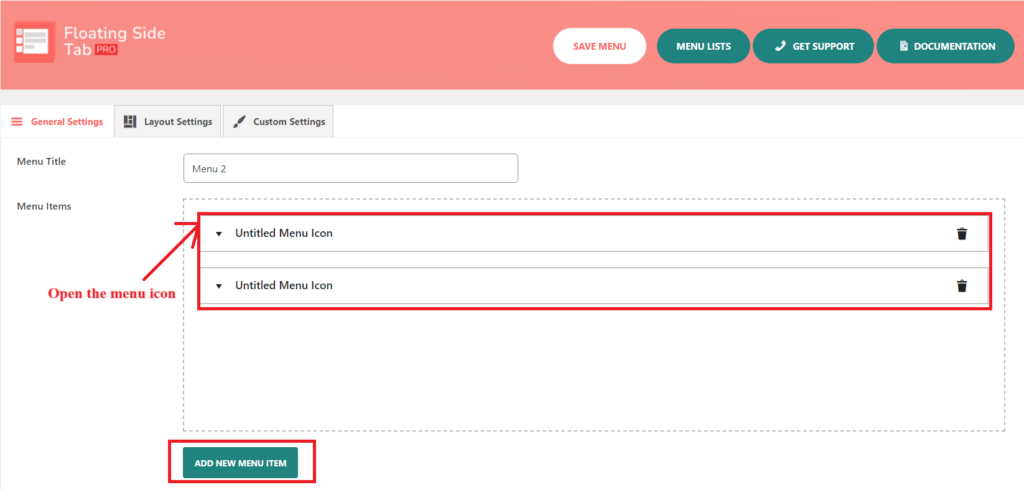
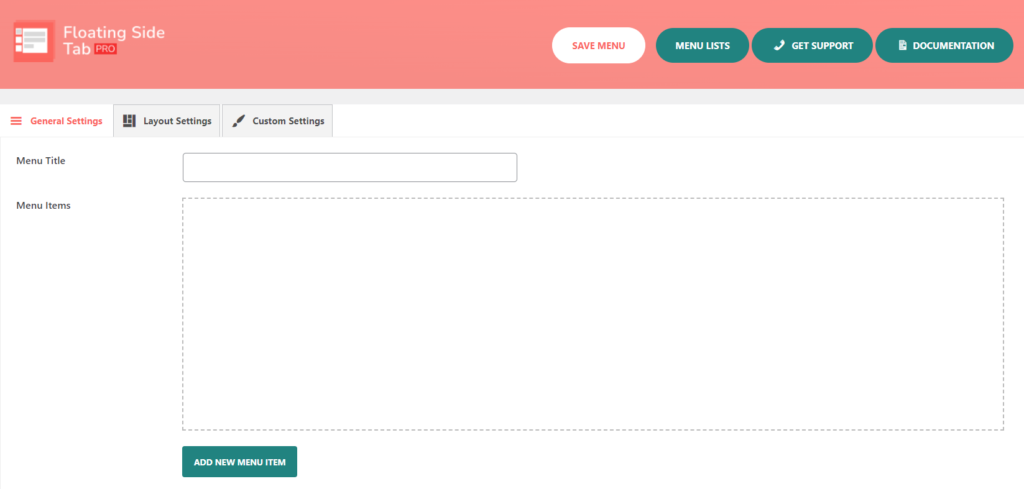
Now that you are inside the plugin settings, you can add a new tab in which you will display recent posts. Click “Add New Tab Menu“. You will be redirected to the tab “General Setting”.
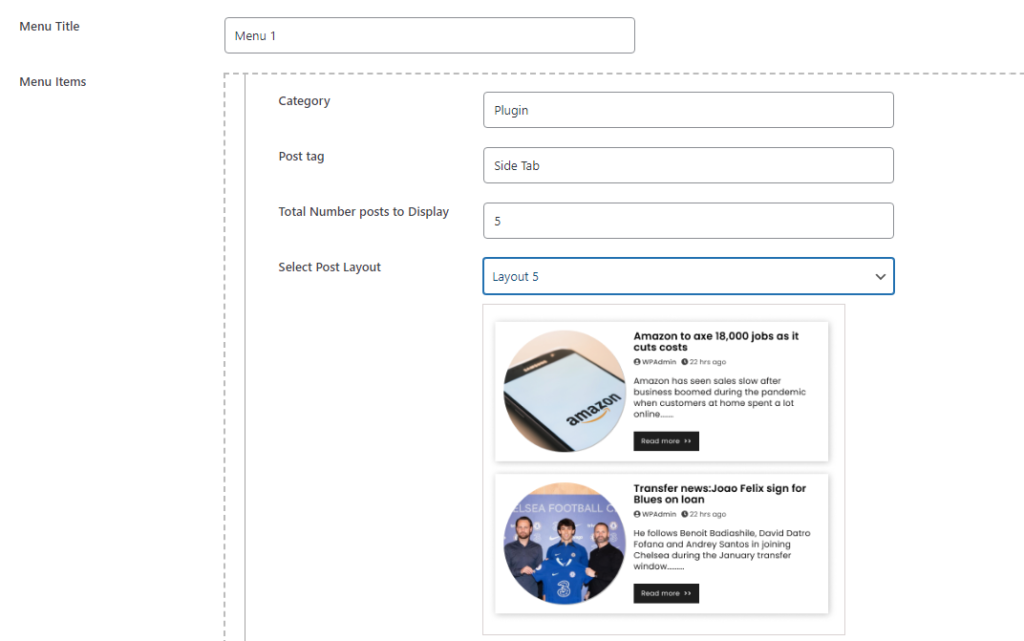
Here, you will find options such as Menu Title, Menu Items, and a button labeled Add New Menu Item. Clicking this button will present you with an empty menu item that is ready for you to add your details. You could make more tabs if you wanted to, but for this example, we are going to stick to just one for your display recent post feature.
Every time you click the “Add New Menu Item, it opens a new menu icon untitled. Each time one clicks the button “Add New Menu Item,” another untitled menu icon will appear.
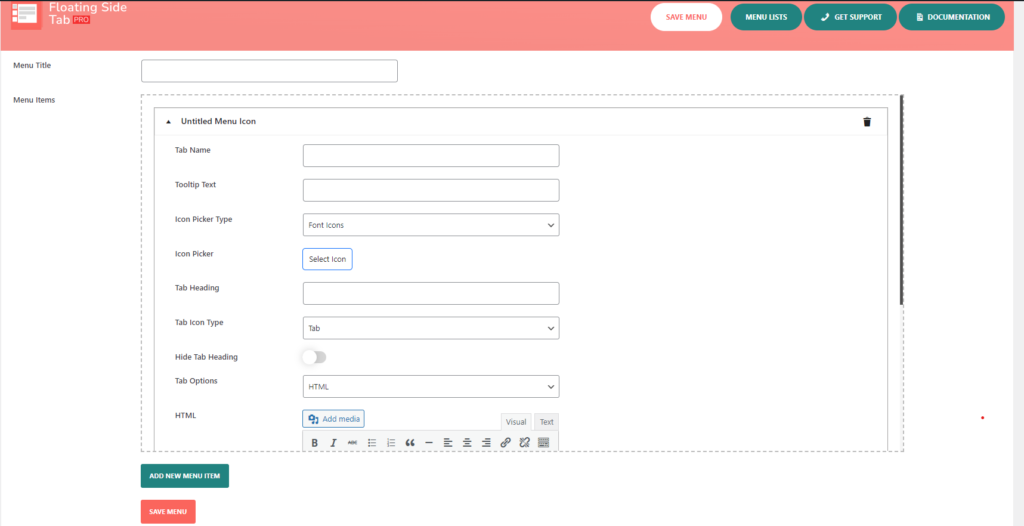
Next, you need to open the “Untitled menu icon.” You’ll notice that there are additional submenu items or options that appear when the user clicks on this specific menu item.
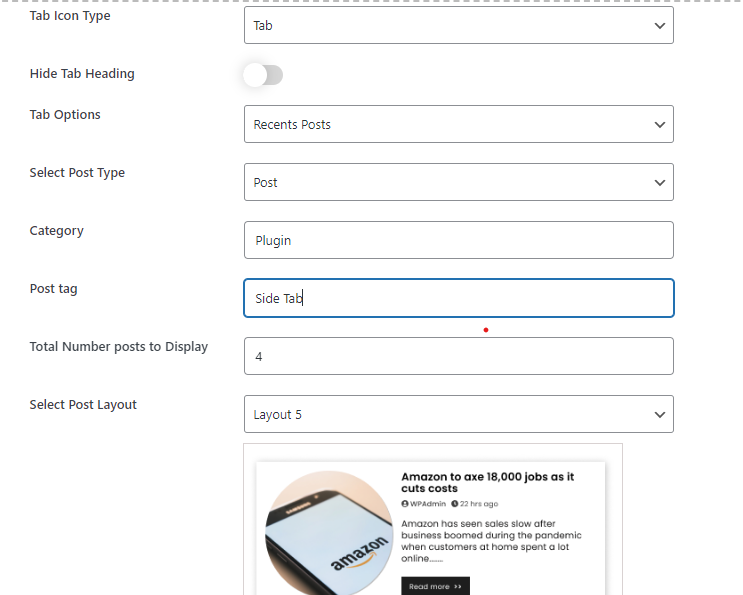
This includes options for managing the Tab Name, Tooltip Text, Icon Picker Type, Icon Picker, Tab Heading, Hide Tab Heading, Tab icon type, and Tab option, as outlined below.
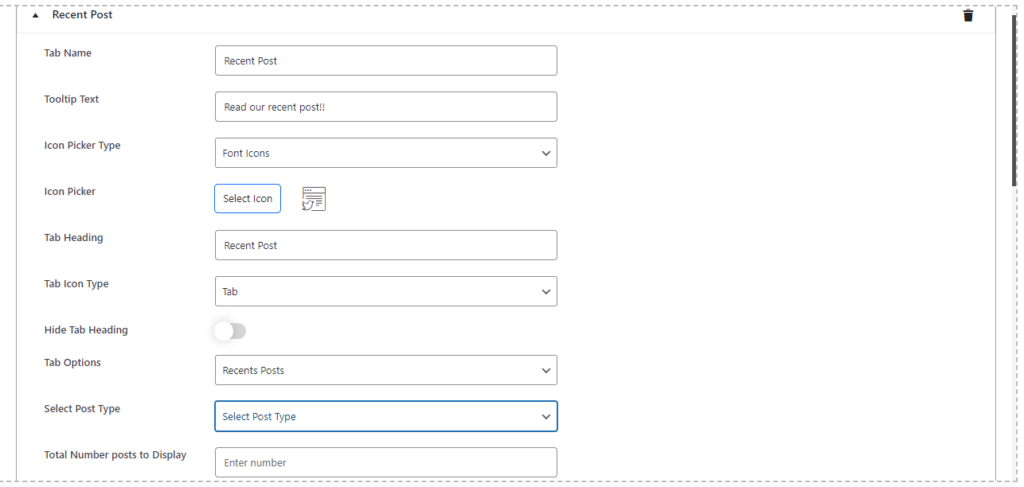
For the tab’s name, keep it straightforward—Recent Posts works well. This makes it clear to your visitors what this tab is all about, helping them easily understand that clicking here will display recent post updates.
Next, I’ll add some Tooltip Text: this is what appears when users hover over the tab. Something like “Read our recent posts!!” adds a bit of a personal touch, inviting them to click through and display recent post updates.
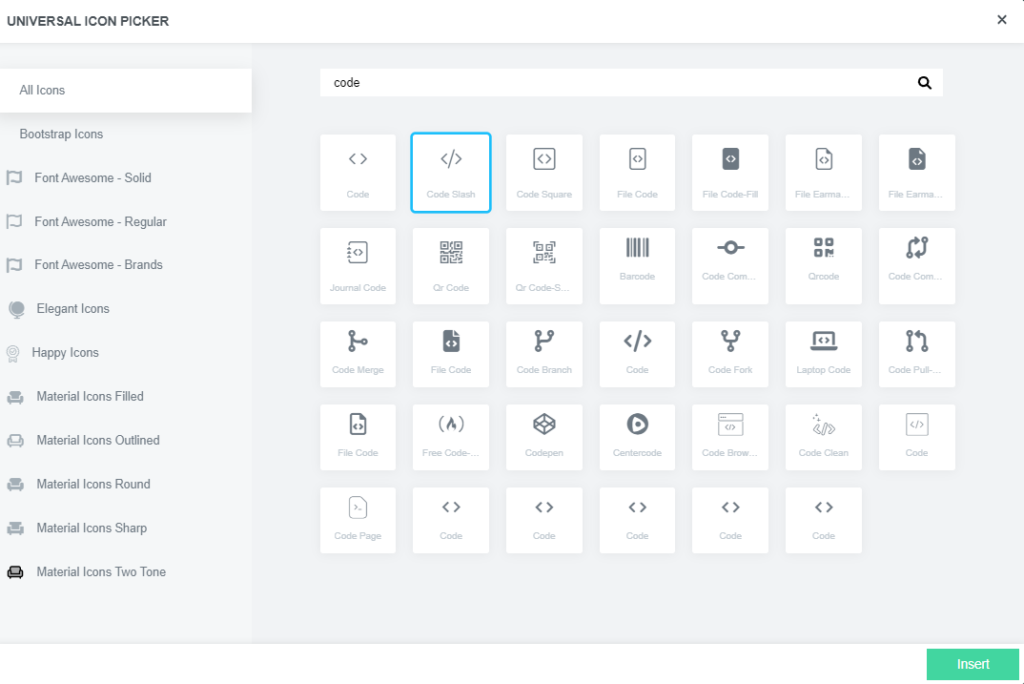
Next, choose an icon to make the tab stand out visually. In the Icon Picker Type, you can pick from various libraries like Bootstrap, Elegant, Happy,Font-Awesome, or Material Icons. It’s all about picking an icon that fits the look and feel of your site.
If you have a custom icon, you can even upload your own.
For the Tab Heading, you can use the same as the tab name—Recent Posts—or be creative if that suits your style better. The heading shows up after a user clicks through to the tab, so it’s worth giving some thought to how it complements the design of your site. You can also hide the heading if you feel the icon alone does the job.
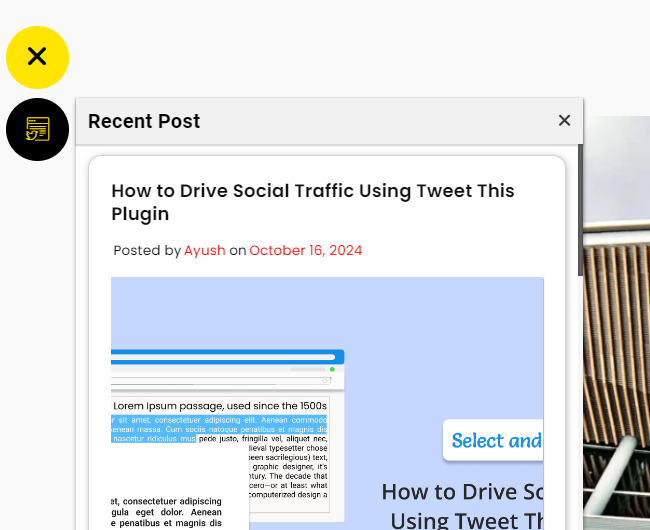
Now, let’s get into the real purpose of this tab—displaying your most recent blog posts.
In the Tab Options, choose Recent Posts. This tells the plugin to automatically pull in and display your most recent posts. Under the post type option, make sure to choose Post because we are dealing with blog posts.
If you want to get specific, you can even filter which posts show up by category. Enter the slugs of the categories you want, separated by commas, and only posts from those categories will display, allowing you to control which posts you want to display recent post content.
Once you determine how many posts should appear in the tab, you can choose from 5 different layout formats. Classic lists to dynamic grids—the format you choose to showcase your content is up to your design.
This flexibility ensures your display recent post content is showcased beautifully, enhancing your website’s overall appearance. Once you’ve selected the number of posts and the ideal layout, you’re ready to move forward!
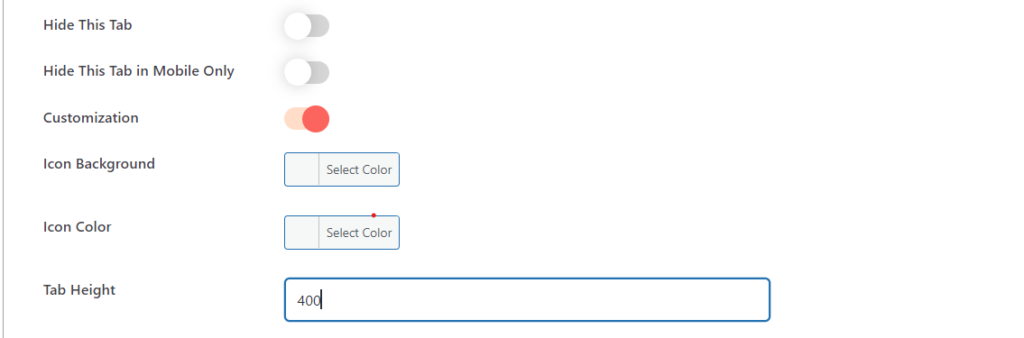
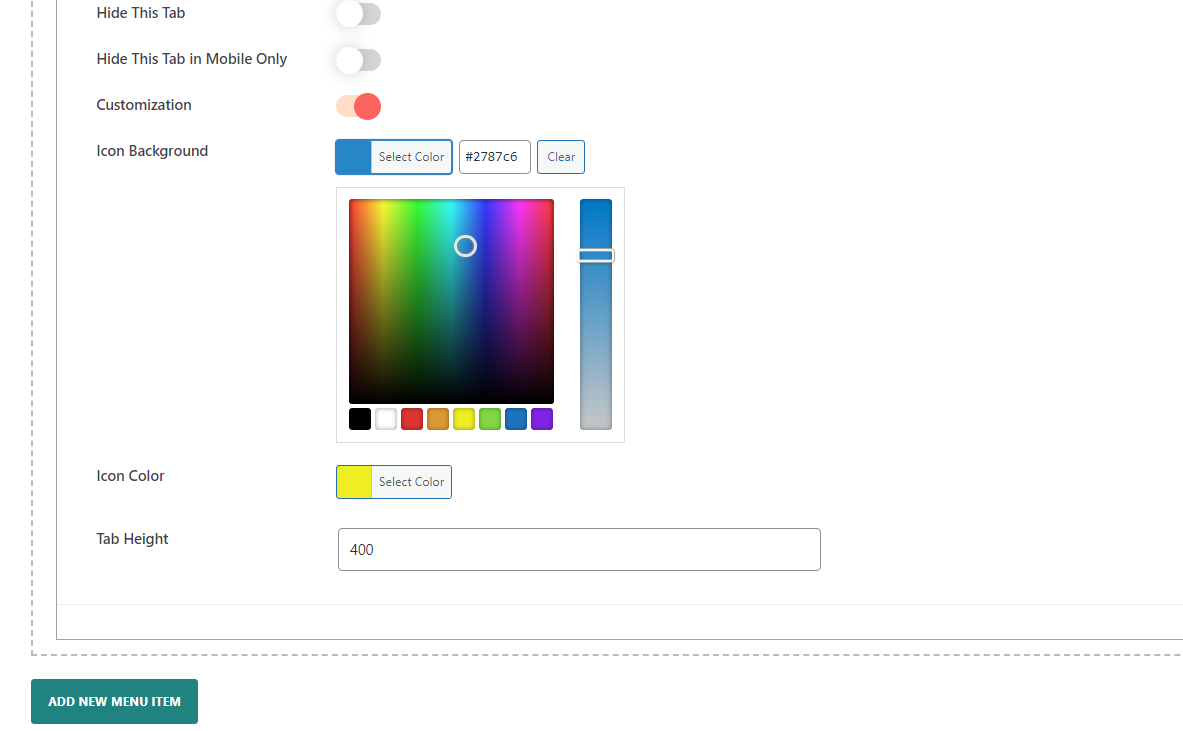
Scroll down to the customization option.
When you enable customization and select the menu icon type as “Tab” in the Floating Side Tab Pro plugin, three customization options will appear:
Here, you can change the Icon background and Icon color by clicking on the color picker tool.
You can also change the Tab height to make it fit according to your design requirements so that you can enhance its appearance according to your layout.
These settings help you customize the tab’s look to match your website’s design and enhance the user experience while displaying recent post content.
4. Configure the layout settings
In the settings within the Layout Settings section of the Floating Side Tab plugin, you can completely configure the position, design, and behavior of the menu. These settings give much flexibility in how the floating tab will interact with your website’s users.
Last but not least, don’t forget to save. The second you do, your newest posts will go live and be available on a floating tab. No matter which page your visitors are on, they’ll be able to access your newest content with a single click, helping you display recent post updates in a smooth manner. That keeps your blog posts visible, enticing more engagement as users continue to find your site.