Installing Instructions
- Unzip the file downloaded plugin from codecanyon. You can download all your purchased files from https://codecanyon.net/downloads
- Upload all the files to the /wp-content/plugins/floating-side-tab-pro
- Activate the plugin through the ‘Plugins’ menu in WordPress.
- For customizing the plugin’s settings, click on Subscribe to Unlock option menu in WordPress left admin menu.
OR
- Open your Dashboard-> Plugins-> Add New
- Click on Upload Plugin
- Click on Choose File
- Select the zip file downloaded from codecanyon and click Install Now
- Once the plugin is installed click on Activate Plugin
- You are done, to customize the plugin’s settings, click on Floating Side Tab Menu option menu in WordPress left admin menu
How to Update
As soon as you receive the update notification email from the codecanyon for our product "Floating Side Tab", you can then go to your codecanyon account's download page and then download the latest update. You can view your downloads page from below link.
https://codecanyon.net/downloads
Once you download the latest version, please deactivate and delete the existing version plugin from your site and install and activate the latest downloaded version. And yes, all your settings and menus will remain as is even after you deactivate and delete and install the new version.
If you have any confusion regarding installing the plugin then you can check the above instructions.
Basic Setup
As soon as the plugin is installed and activated, you will be able to view the Floating Side Tab menu in the left admin menu. And you can then click on that menu to see the settings page of plugins.
To add a menu, you can click the add new menu item then configure the settings as per your need.
There are 3 different settings section as belows:
- General Settings
- Layout Settings
- Customize
Add New Menu Settings
Here is the menu option after clicking on add new menu.
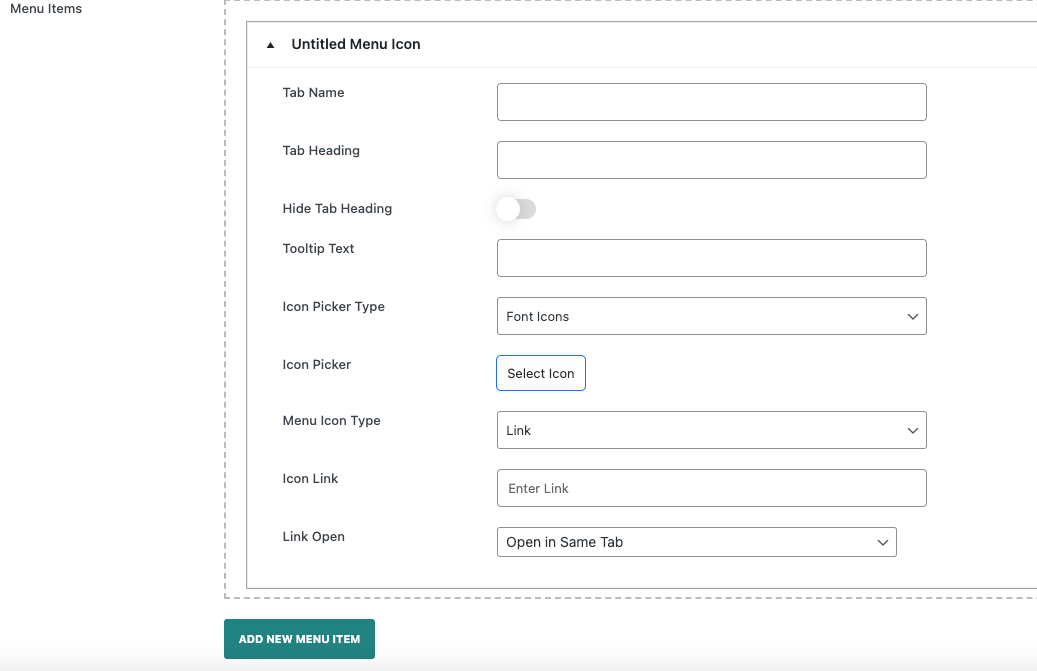
- Tab Name - It is used to display tab name in frontend.
- Tab Heading - It is used to display tab heading above the content of menu.
- Hide Tab Heading - If this is enable then, It will hide the tab heading of this tab.
- Tooltip Text - It is used to display tab tooltip text.
- Icon Picker Type - There are available icon picker with variety of icons such as Bootstrap Icons, Font-Awesome Icon ,Elegant Icons,Happy Icons,Materials Icons.If you want to display custon icon then, You can select Custom Icon and upload the icon.
- Menu Icon Type - There are two menu icon type. Tab type, Link type
Tab Options
Here is the tab option after selecting tab on menu icon type.

- HTML - After selecting tab option HTML then, It will give you WP Editor to add your content.
- Contact Form - After selecting tab option contact form then, It will give you input field to add your contact form shortcode to display it on frontend.
Install Contact form 7 plugin for contact form - WooCommerce Products - After selecting tab option WooCommerce Products then, It will give you four different option shown in below.

- WooCommerce Products Options
- Product Category - You can enter product category slug if multiple then entered with comma separated slug.
- Total number to display product - You can to enter total number of product to display in frontend.
- Thumbnail Size - You can select any thumbnail size from this option.
- Product Layout - There are 5 different product layout shown in below.

- Social Media - After selecting tab option social media then, It will give you 2 different option shown in below.

- Social Media Options
- Social Layout - There are 3 different social media layout.
- Social Icons - By clicking Add New Social Icon, You can add unlimited social icons with icon-picker in social icon tab shown in below.

- Recent Post - After selecting tab option recent then, It will give you 4 different option shown in below.

- Recent Posts Options
- Select Post Type - You can display any post type post which is registered on your site.
- Post Type Taxonomy - According to selection of post type it will show you post type taxonomy to enter slug of term.
- Total Number posts to Display - You can to enter total number of post to display in frontend.
- Thumbnail Size - You can select any thumbnail size from this option.
- Post Layout - There are 5 different post layout shown in below.

- Subscription Form - After selecting tab option subscription form then, It will give you input field to add your subscription form shortcode to display it on frontend.
Install WP Subscription Form plugin for Subscription form
General Settings
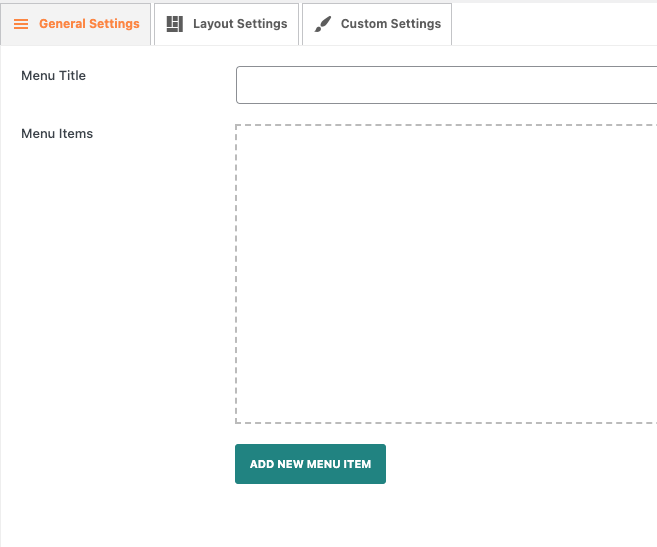
Once you install and activate the plugin then you can add new menu items and configure all the necessary general settings related with the plugin from the general settings. In general settings you will find below options.

Here are the description of individual options available in the basic settings.
- Menu Title - It is a title of menu.
- Menu Items - It is the field for adding menu items by clicking add new menu item button.
Layout Settings
You can display a menu in 6 different positions with 24 different templates.

Here are the options available in this section:
- Menu Positions - There are available 6 types . Mid Left, Mid Right, Top Left, Bottom Left, Top Right, Bottom Right
- Choose Template - There are available 24 different templates.
- Icon Animation - There are available 6 different icon animations. Slide Spin-Infinity, Bounce, Zoom, Rotate
- Hide in Mobile - You can hide in mobile if necessary.
Specific Post/Page Settings

- Disable Status - If you enable this option then,It will not show selected menu for this specific post/page.
- Select Menu - You can select specific menu for this page / post to display it.
Customize
In this section you can customize the layout through our inbuilt color customization options. The options available in the section comes handy when the pre designed template doesn't fulfill your needs and you want to style the menu color as per your need.

Here are the available customization options for the custom color styling.
- Custom CSS
- Post Button Label
- WooCommerce Button Label
- WooCommerce Add to Cart Button Label
Color Customization Status
If color customization status is enable then it will set these color for your menu.
- Tab Text Color
- Tab Background Color
- Tab Outer Background Color
- Text Hover Color
- Tab Hover Color
Display Settings
You can display a menu in different pages of your site.
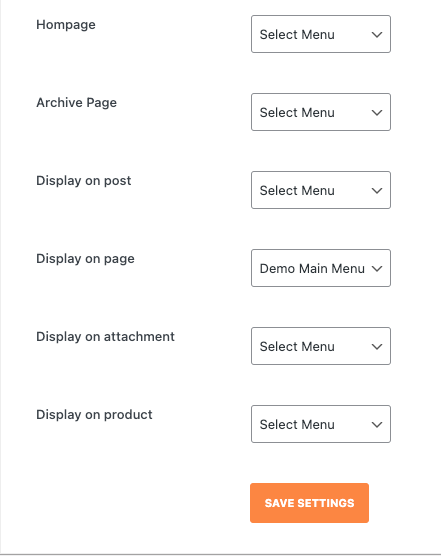
- Homepage - Select a menu to display in homepage.
- Archive Page - Select a menu to display in Archive Page.
- Display on post - Select a menu to display in post.
- Display on page - Select a menu to display in page.
- Display on product - Select a menu to display in product page.